Got feedback? Additional questions? Just want to have a friendly chat?
Get in touch!
Create a database data set
This article explains how to create a new database data set from the UI, optionally initialize it from an existing data set, and how to delete it afterwards.
Step 1: Open the create data set wizard
-
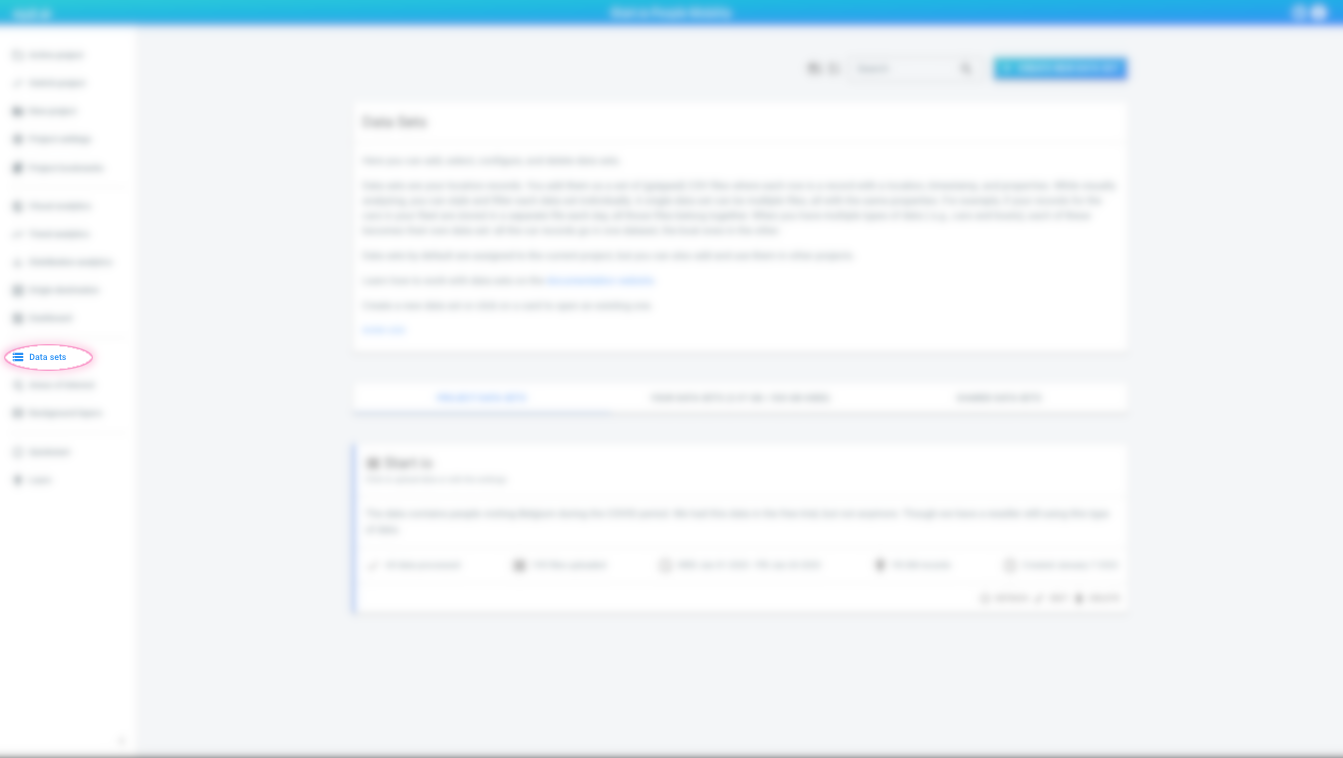
In the left navigation bar, click Data sets.
Figure 1. The Data sets button in the navigation bar -
In the top-right corner, click Create new data set.
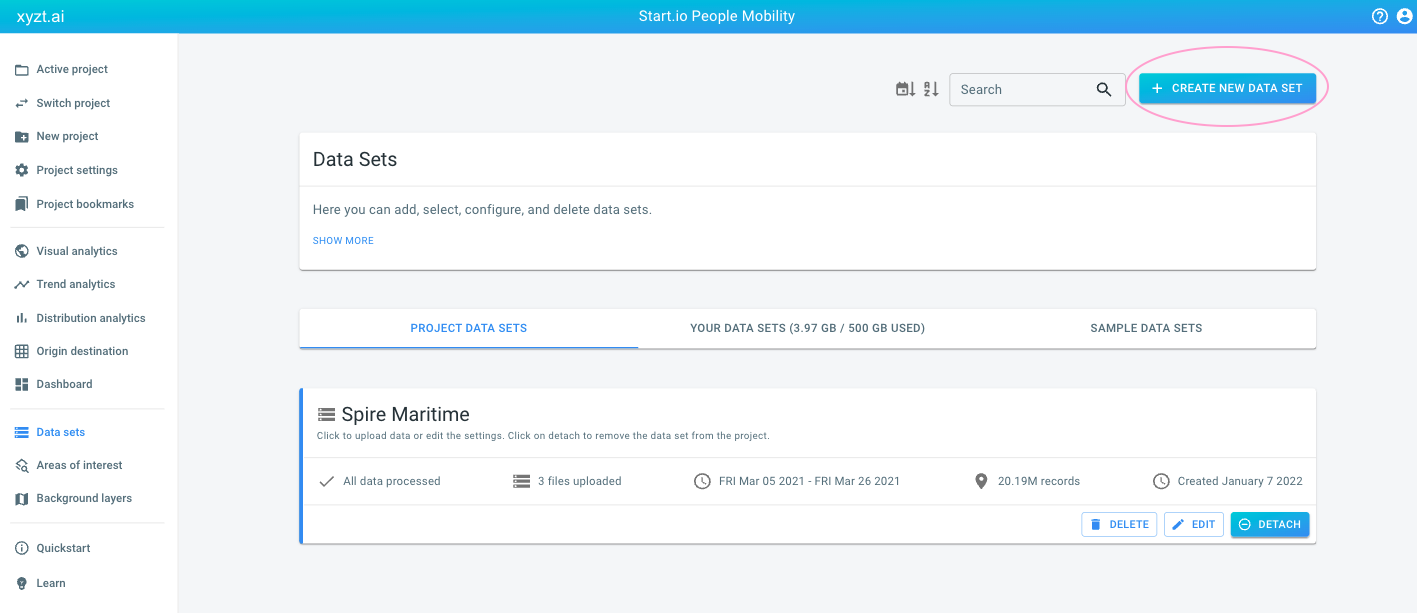 Figure 2. The Create new data set button in the top right corner
 -
At the top of the page, open the Create from database tab.
 Figure 3. The Create from database tab
Step 2: Enter connection and basic data set information
Fill in the form with the following information:
-
Name: the name shown in the UI when the platform refers to this data set.
-
Data type: the type of data set you want to create. See different types of data sets. Available options:
-
Geometry data (static geometries without temporal information)
-
Time series data (temporal data associated with fixed geometries)
-
Movement path data (trips along a network with locations, timestamps, and attributes)
-
-
Database technology: for example PostgreSQL (PostGIS).
-
Database URL, Database user, Database password.
-
Table names: these depend on the selected data type.
-
What is moving / what shapes represent: a human-readable label (for example, road segments or city neighborhoods). This label appears on analytics pages.
-
Description (optional): shown on the data set overview page.
If the connection details are correct, the status at the bottom of the form changes from "Database not connected" to "Database online". If it stays offline, click Create data set to see a more detailed error message.
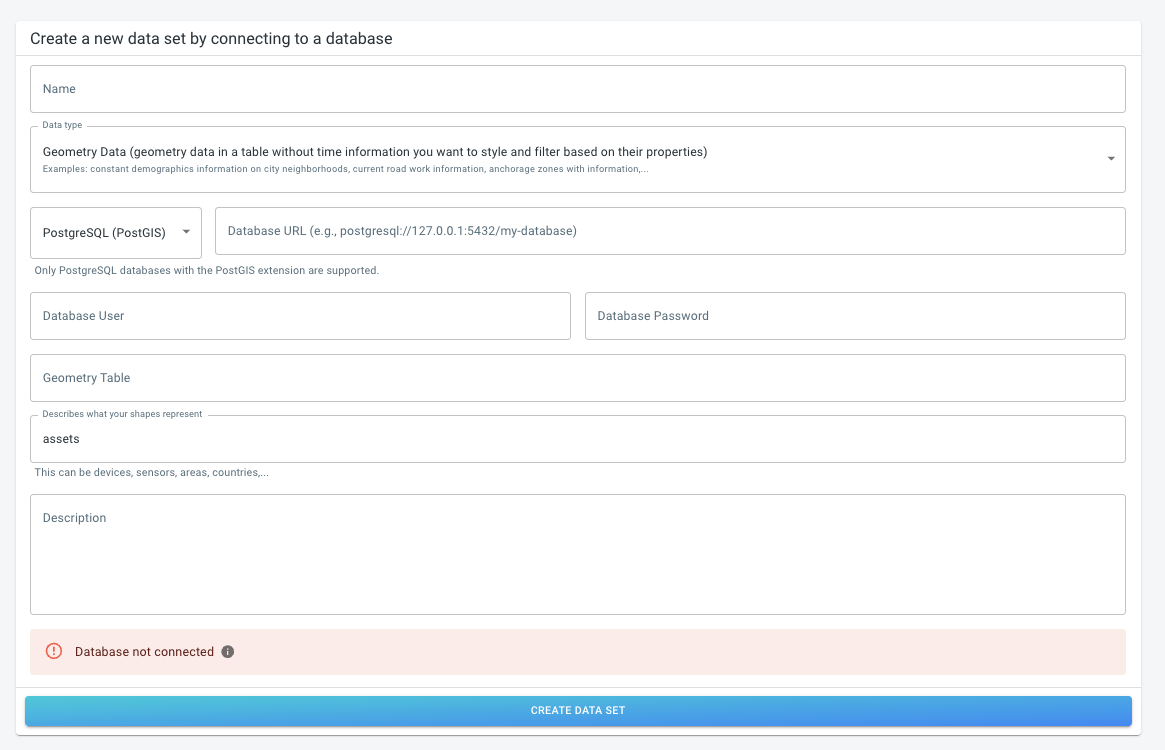
Figure 4. The form to create a database data set
Once the form is complete, click Create data set.
Step 3: Link a geometry data set (movement path data only)
If you created a Movement path data set, the next page asks which geometry data set it should link to. Select an existing geometry data set from the list.
If the required geometry data set does not exist yet, create it first (as a database data set) and then return to this step.
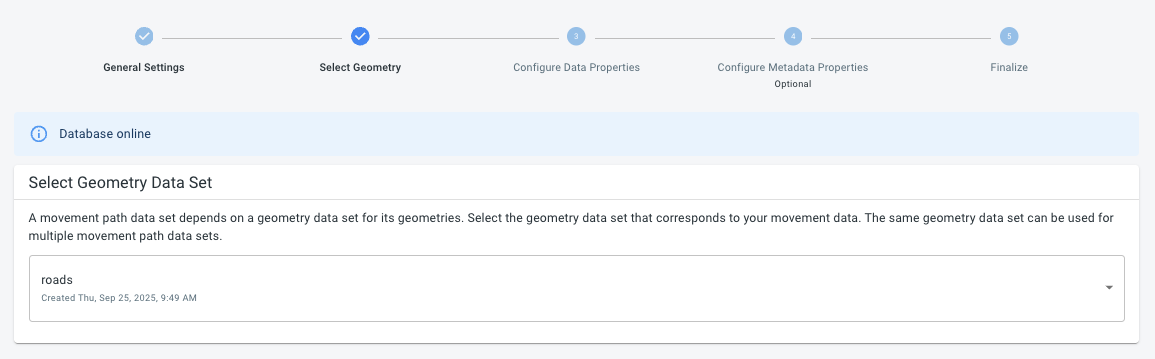
Figure 5. The Select Geometry data set page
|
Because analytics may execute joined queries across tables, all tables belonging to the same data set must be in the same database and have the same access rights. The username used to connect to the geometry and movement path data sets should be the same. |
Step 4: Configure the table columns
After the connection is set up, configure the columns for the table(s) that belong to your data set:
-
Geometry data: configure the geometry table
-
Time series data: configure the geometry table and the time series (data) table
-
Movement path data: configure the data table and optionally the metadata table (if present)
You can configure fields in one of three ways:
-
Use the wizard
-
Upload a predefined properties file
-
Copy the properties from another data set
When using the wizard, a preview of sample rows is shown. For each column:
-
Select a content type to include it (for example, ID, geometry, timestamp, …)
-
Select
-to exclude it
Make sure to assign the correct content type, as the platform uses this information to interpret, analyze, and visualize your data.
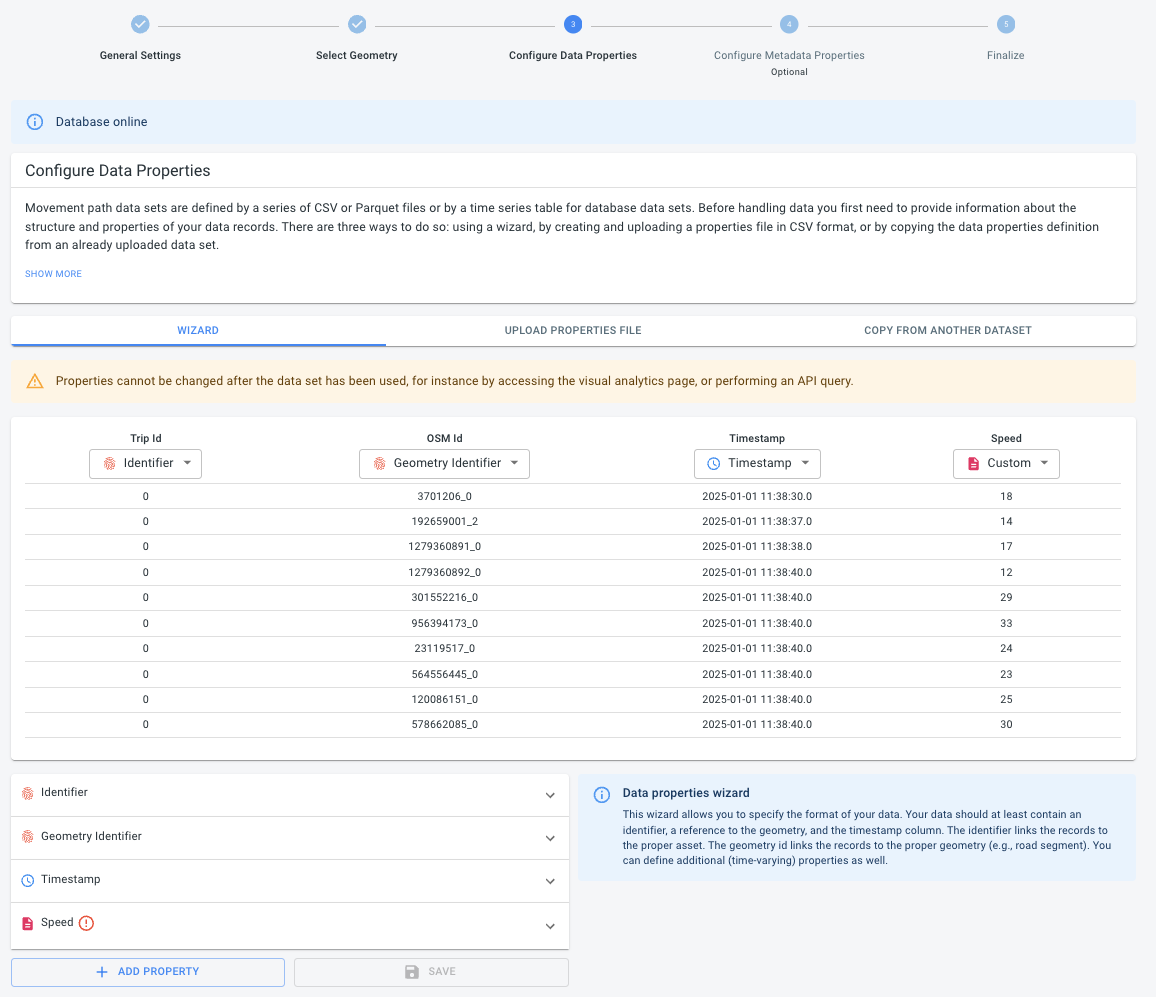
Figure 6. The Configure data properties page
The platform attempts to auto-detect special columns (such as ID and geometry). Adjust these if the guesses are not correct.
Once a column has a content type, it appears in the selected properties list. Expand each property to configure additional details when required (for example, accuracy, minimum/maximum values).
|
Don’t forget to click Save after changing defaults. |
If your data set uses multiple tables (time series or movement path data), the wizard will show an equivalent configuration page for the next table.
Step 5: Finalize the data set
When you are done configuring the columns, open the final step Finalize and click Finalize to make the data set available.
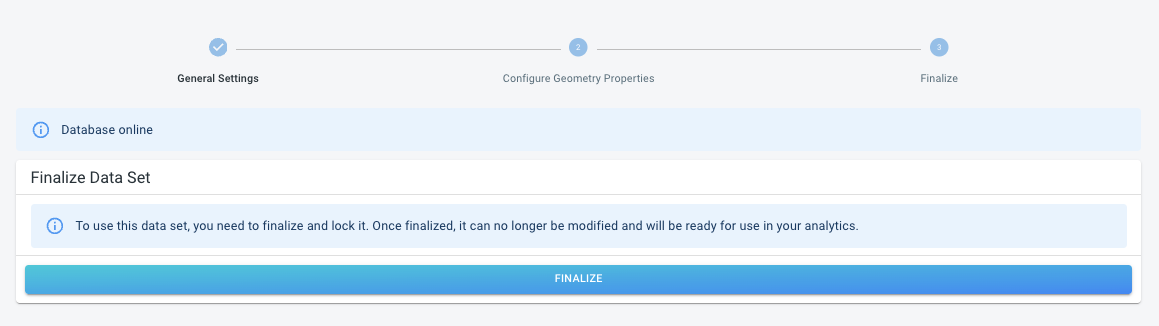
Figure 7. Finalizing the data set configuration
Optional: Initialize from an existing data set
If you need to create multiple similar data sets (for example, one per month) or create a copy with slightly different properties, you can initialize a new data set from an existing one.
-
In the create data set wizard, open the Initialize from existing tab.
 Figure 8. The Initialize from existing tab
 -
Select the source data set and provide a new name (and optional description).
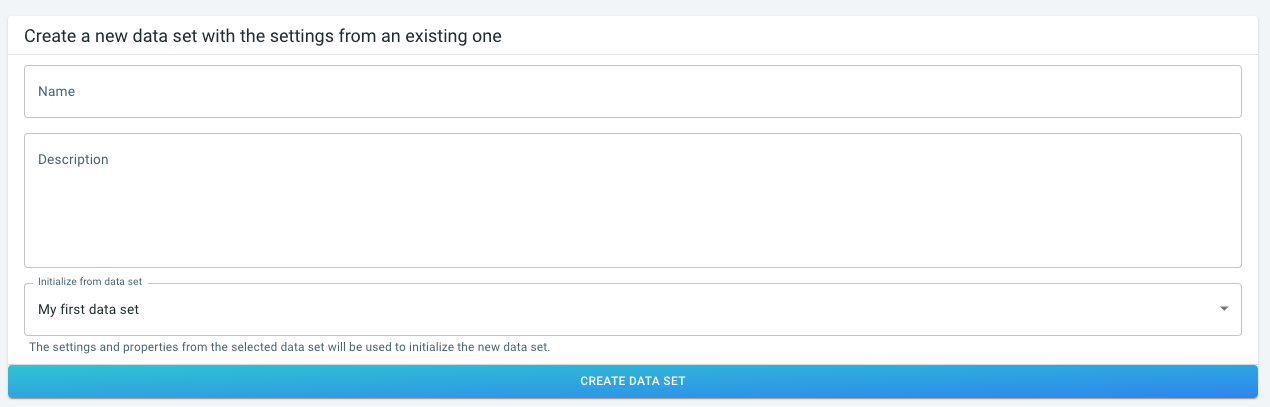 Figure 9. The Initialize from existing form
 -
Continue with Step 4: Configure the table columns to review or adjust the configuration.
Delete a database data set
Deleting a database data set follows the same steps as deleting any other data set. See How to delete a data set.
|
Deleting a database data set does not delete anything in your database. It only removes the data set configuration from the platform, even if the database user has write permissions. |
Got feedback? Additional questions? Just want to have a friendly chat?
Get in touch!