
Got feedback? Additional questions? Just want to have a friendly chat?
Get in touch!
What are data sets?
A data set is the resource that will contain your location data (.csv files).
You create a new data set for each collection of .csv files with location records you have.
For example, one data set can contain .csv files with GPS records of cars.
Another data set could contain people’s location during an indoor event.
How to create a new data set
Step 1: Navigate to the 'New data set' page
by first clicking on the Data sets button in the left navigation bar
Figure 1. The Data sets button in the navigation bar
and then on the Create new data set button in the top right corner of the Data sets page.
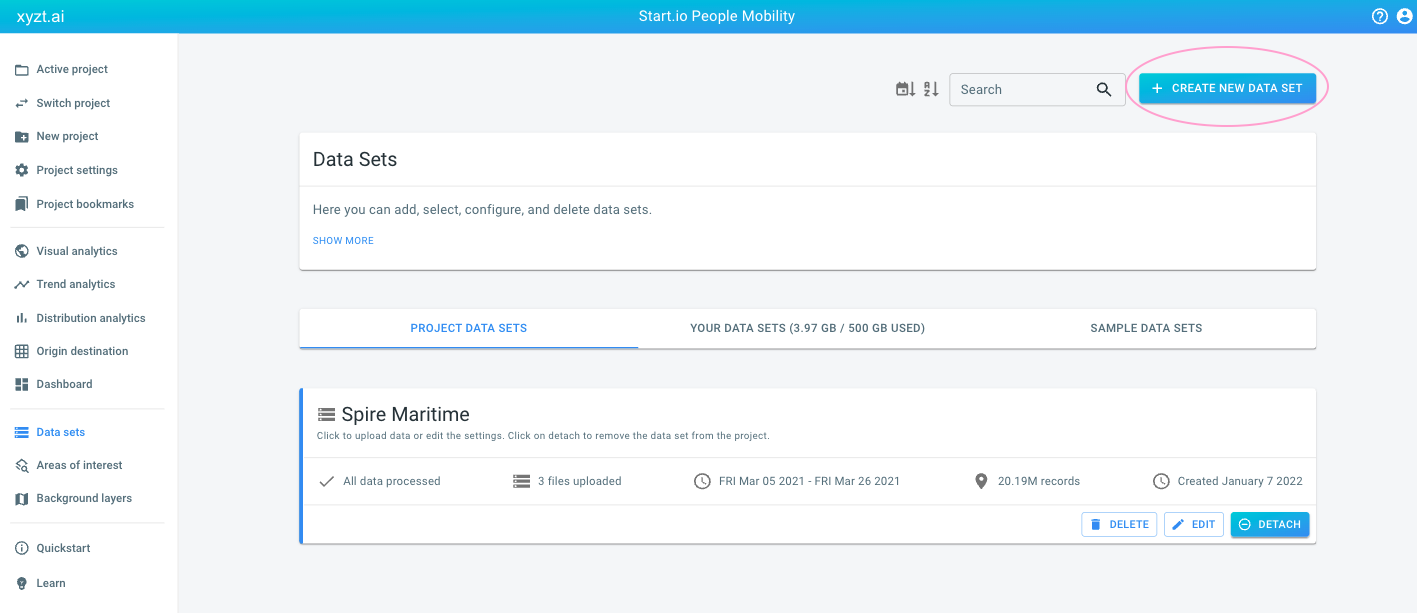
Figure 2. The Create new data set button in the top right corner
Step 2: Create the data set
by specifying the Name, the Data type, the Asset or entity type and the Description.
-
The Name is used in the UI when we need to refer to that layer. This is a good location to add some more details about this data set.
-
The Data type of the data set indicates what kind of data set you want to create. This depends on the data you want to upload. The different types of data sets article explains the differences between the different types. You can choose between:
-
Movement Data (Locations, time stamps, and attributes in CSV files for things or people that move)
-
Time Series Data (temporal data in CSV files for fixed shapes defined as points, lines, or polygons in GeoJSON files)
-
GeoJSON Data (GeoJSON files without time information)
-
-
You have to describe either What is moving or What your shapes represent. Examples are persons, vessels, airplanes for things that move, or devices, sensors, areas for shapes that remain in place. This name will be visible on the analytics pages.
-
The optional description is shown on the overview page with all the data sets.

Figure 3. The form to create a data set
Once you have filled in the form, press the Create data set button.

Figure 4. The Create data set button
Step 2 alternative: copy from a template
When you have data that you want to split over multiple data sets (for example one data set containing the data of January, another the data of February, …), you can create a new data set by copying the settings and properties of an existing data set.
The new data set will have all the same settings and properties as the existing data set, but will not yet contain any data.
This allows you to immediately start uploading data to your data set, without having to define the properties first.
You can do this by activating the INITIALIZE_FROM_EXISTING tab at the top of the Create data set page.

Figure 5. The Initialize from existing tab
The page allows you to create a new data set, with all settings initialized from an existing data set. The name and description of the new data set need to be configured as well.
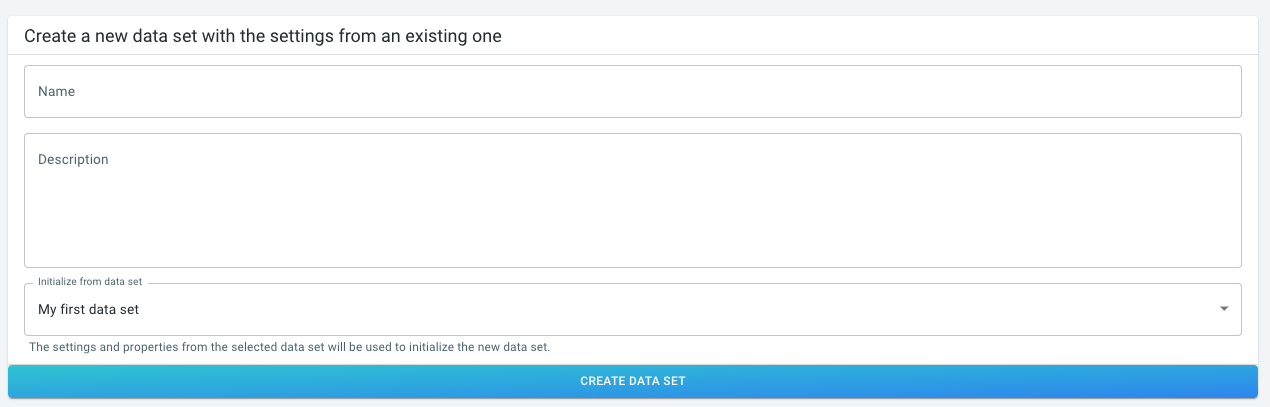
Figure 6. The Initialize from existing form
Step 3: Upload your CSV and GeoJSON files to the data set
At this point, the data set is created, but it doesn’t contain any location data yet.
You need to upload your .csv and .geojson files to the data set before you can do anything useful with it.
-
Data sets containing movement data: see the data upload article for movement data for more information on how to do this, or follow a tutorial where you will upload some sample movement data to a data set.
-
Data sets containing time series data, measured in a fixed location: see the data upload article for time series data for more information on how to do this, or follow a tutorial where you will upload some sample time-series data to a data set.
Got feedback? Additional questions? Just want to have a friendly chat?
Get in touch!