|
This article only applies to time series data
This article is only relevant when working with time series data, not when working with movement data. You can read more about the differences between the two in this article. |
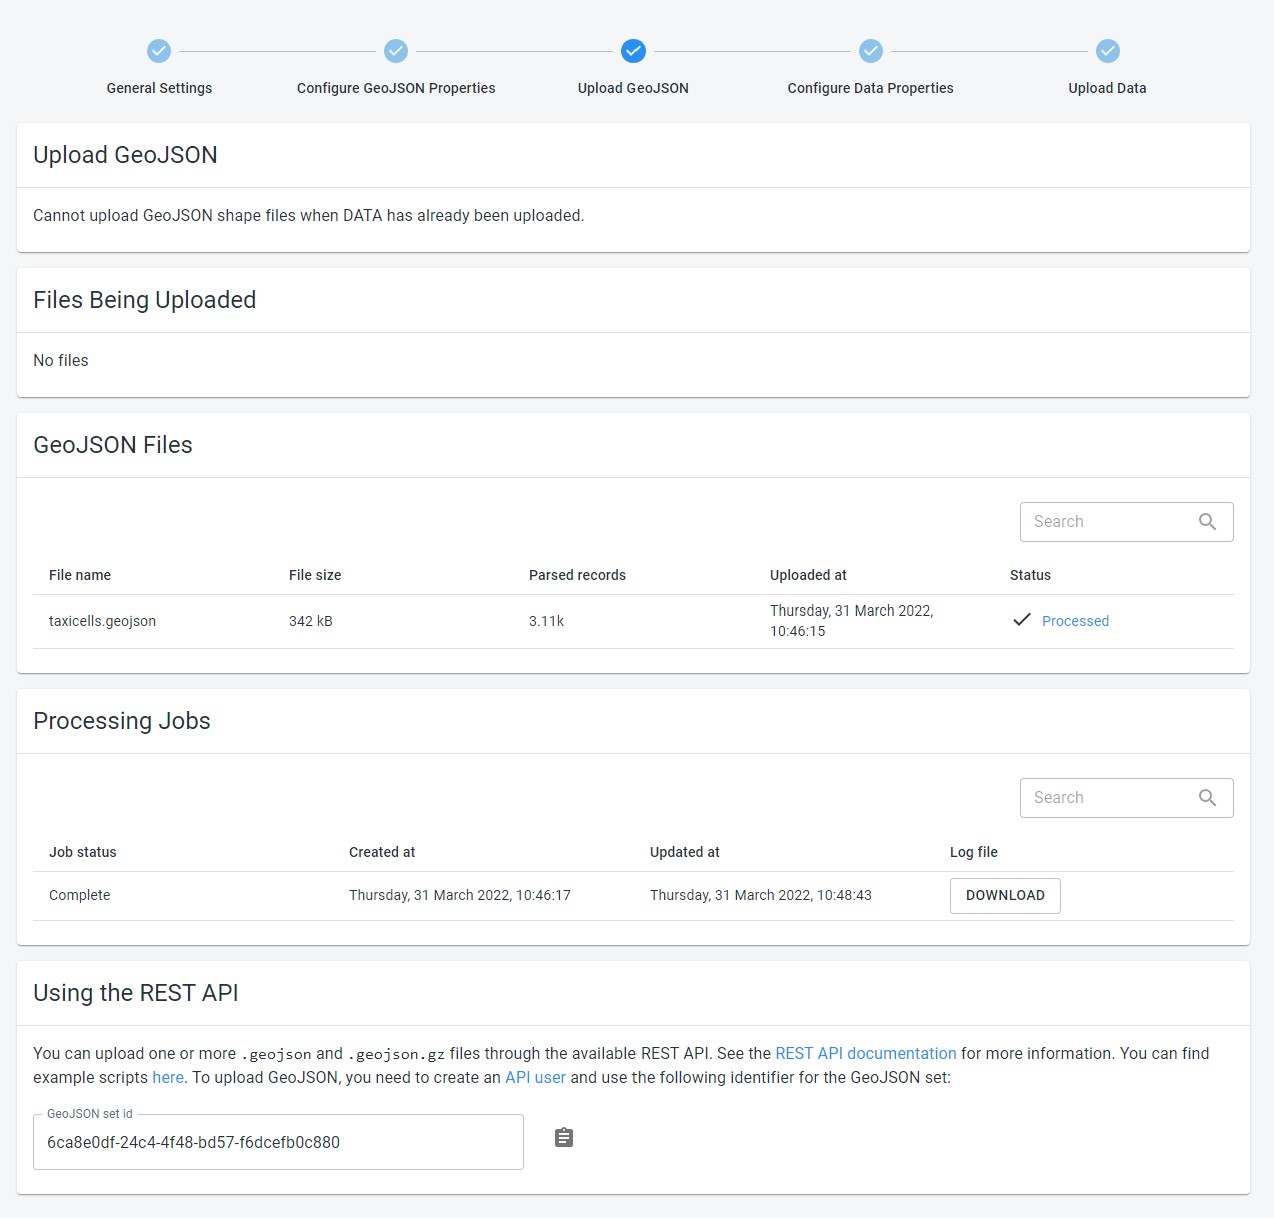
When creating or editing a data set, the UI to upload new files is accessed by clicking the Upload GeoJSON, which is the 3rd step in the data set creation workflow.
That page is divided in a few parts:
The drop zone: this is the area onto which you drop the .geojson or .csv files you want to upload
A list of the files that are currently being uploaded. After you have dropped a file onto the drop zone, it will appear in this list
The list of files that are part of the data set. This list will contain all the files that were already received by the platform for this particular data set, as well as display the status of the file. When you click on the status link, the processing log file for that particular file will be opened.
The list of processing jobs that have run for this data set, and a button to download the log file for that job. In case there was a problem with the processing of your data, that log file might contain more details about the encountered problems.
In most cases this list only contains a single item.
The identifier of the data set, which you will need if you want to use the REST API to script your data uploads.
To actually upload your GeoJson files, you can:
Drag-and-drop your files onto the drop zone, or
Click on the drop zone to open a file chooser and select the file(s) you want to upload
|
Start the upload of multiple files and continue
You can drag-and-drop multiple files onto the drop zone in one go (or select multiple files in the file chooser). Once you have done that, you can leave the page if you want. The files will continue uploading in the background, and processing will start automatically once the platform receives your files. Just don’t close nor refresh the browser tab. |