Got feedback? Additional questions? Just want to have a friendly chat?
Get in touch!
Shortcut for bookmark and link creation
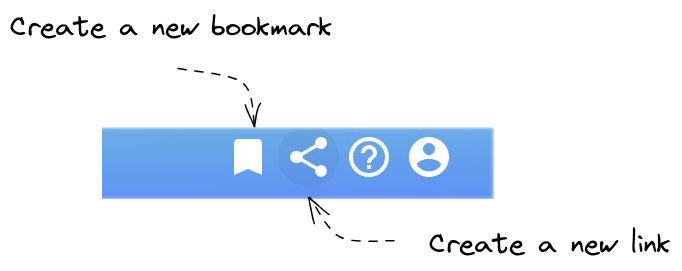
The toolbar at the top contains in the right corner shortcut icons to create a bookmark or a link. Click on the icon and follow the instructions to create a bookmark or a link.
Figure 1. The shortcuts to create a bookmark or a link directly from the toolbar (only visible on pages that support bookmarking and/or linking).
When you have first loaded a bookmark and then press the bookmark shortcut icon, you will be asked whether you want to update the existing bookmark or prefer to create a new one.
That way, the shortcut icon is also a fast way to update existing bookmarks.
|
Creating a link will create a bookmark
All links are created for a specific bookmark (read more). Therefore, when you use the shortcut to create a link, it will automatically create a bookmark first and then a link for that bookmark. As a result, you will find that created bookmark on the Project bookmarks page. |
How to create a new bookmark for a project
|
Use the shortcut
There is a shorter way to create a new bookmark, described at the start of this article |
Step 0: Load the project
You can only create bookmarks for a project when that project is loaded.
Step 1: Navigate to the 'Project bookmarks' page
by clicking on the Project bookmarks button in the left navigation bar
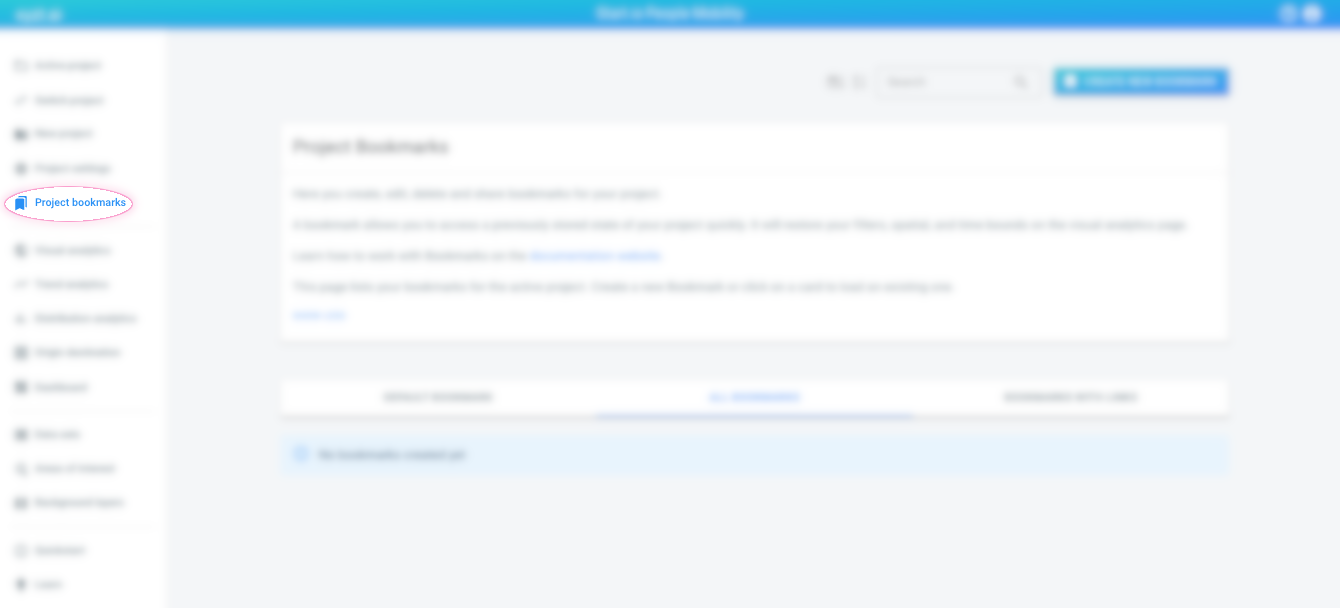
Figure 2. The Project Bookmarks button in the navigation bar
and then on the Create new bookmark button in the top right corner of the Project bookmarks page.
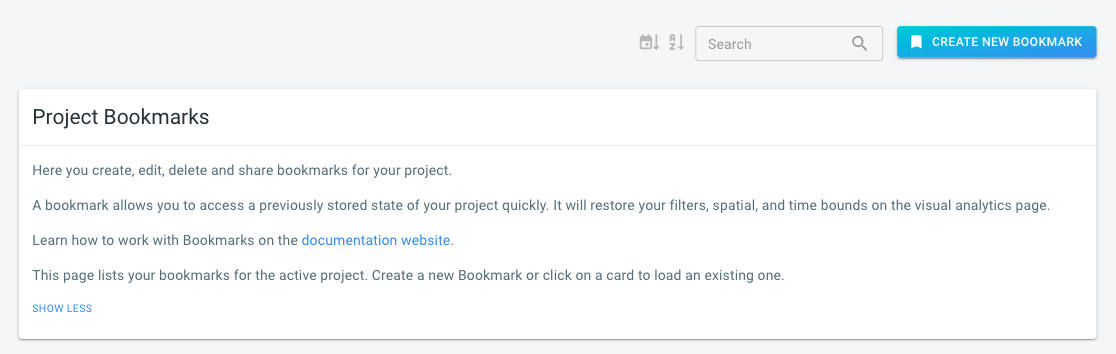
Figure 3. The Create new bookmark button in the top right corner
Step 2: Create the bookmark
Provide a name and optional description for your project. Afterwards, press the Create bookmark button.
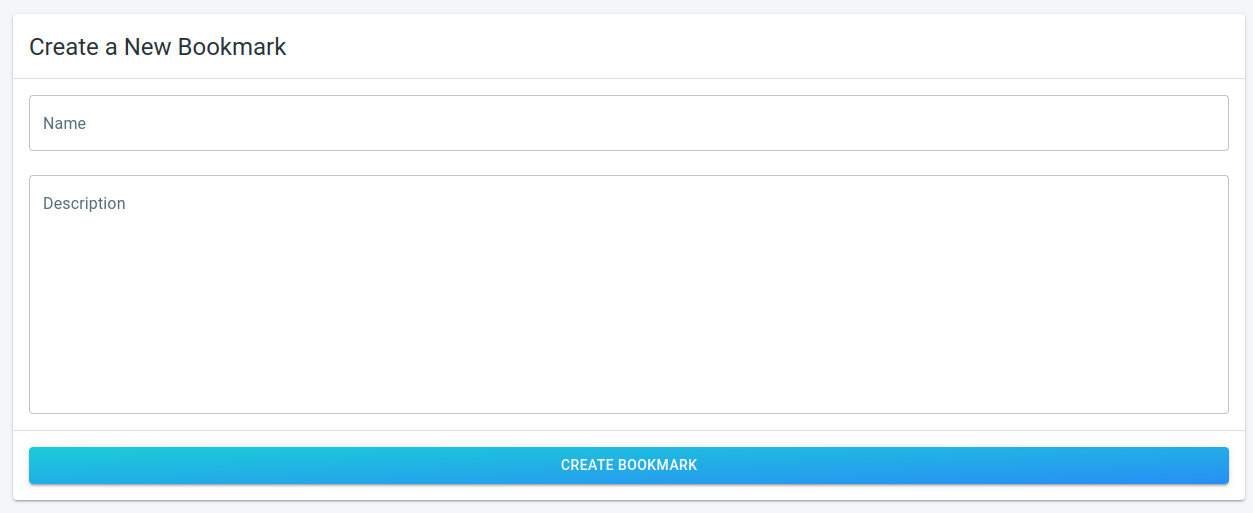
Figure 4. The form to create a new bookmark
Step 3: Optionally, mark as default
Once the bookmark is created, you will be redirected to the Project bookmarks page where your new bookmark is now available. On the bookmark card, you can choose to mark the bookmark as the default one.
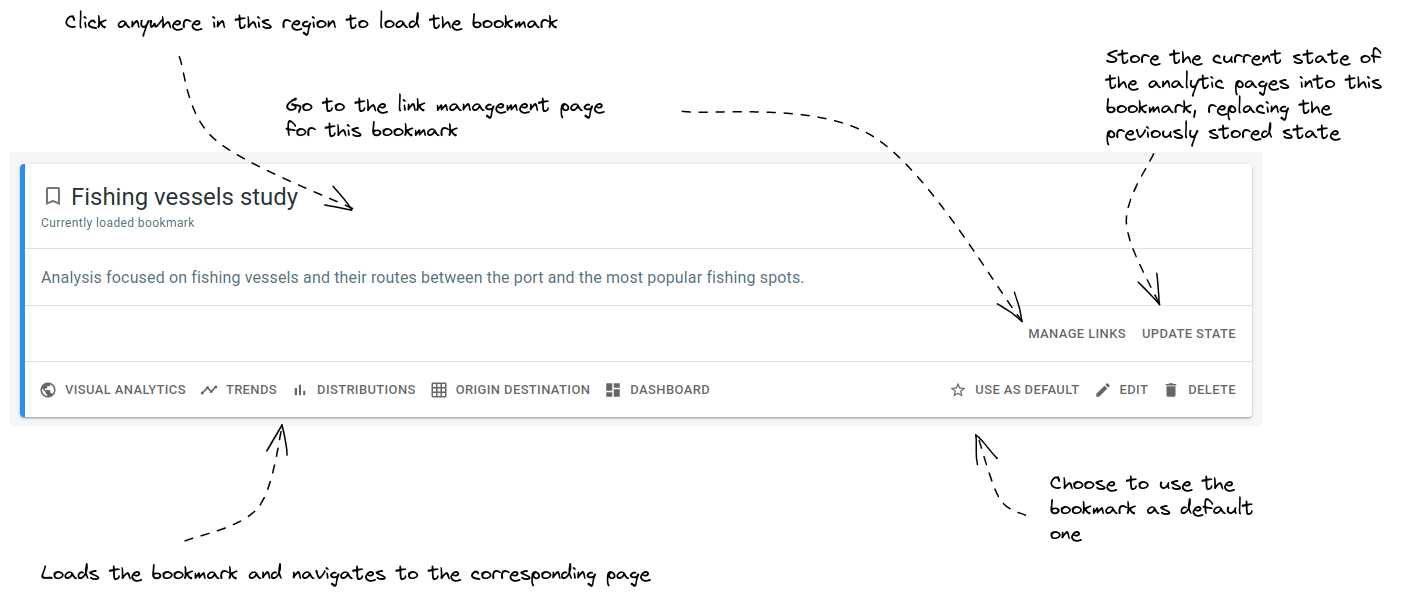
Figure 5. The card for the created bookmark
When a project has a default bookmark, that bookmark will be loaded when people load the project. This allows to change the default styling and filters for the project, and the default spatial and temporal bounds.
For example, if your project analyzes tankers in the Suez Canal, you can locate Suez Canal on the map and apply a filter only to show tanker vessels and bookmark the project to make it the default. Your project’s visual analytics page will, from then on, load fitted on the Suez Canal, showing only the tanker vessels.
How to create a new link
|
Use the shortcut
There is a shorter way to create a new link, described at the start of this article |
Step 0: Create a bookmark
You can only create a link for a bookmark (as explained here), so if you don’t have the bookmark you want to link to yet, you will have to create it first.
Step 1: Navigate to the 'Project bookmarks' page
by clicking on the Project bookmarks button in the left navigation bar
Figure 6. The Project Bookmarks button in the navigation bar
Step 2: Find the bookmark for which you want to create a link
The project bookmarks page lists all the bookmarks to which you have access.
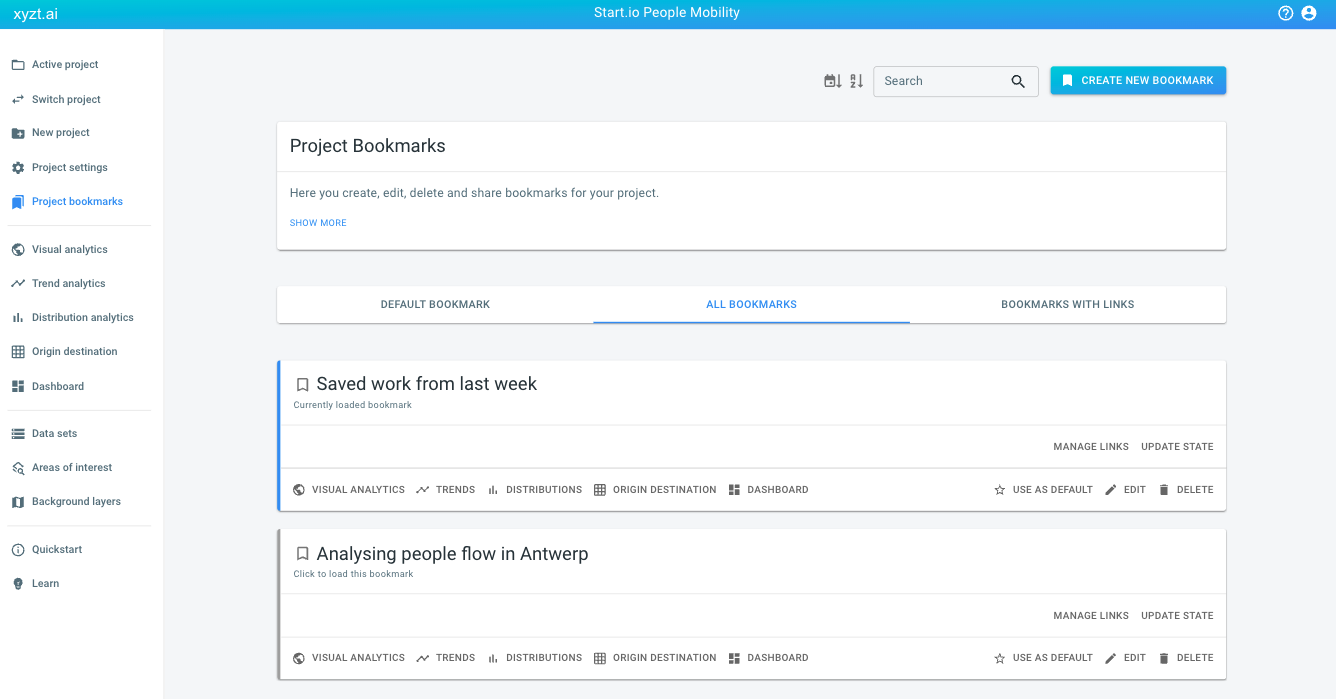
Figure 7. The Project Bookmarks overview page
There are 3 tabs to select bookmarks from:

Figure 8. The Project Bookmarks three tabs
-
DEFAULT BOOKMARK: shows the default bookmark for the project, if nay
-
ALL BOOKMARKS: lists all the bookmarks for the project. This includes the default bookmark or the ones that have links.
-
BOOKMARKS WITH LINKS: these are bookmarks that already have links.
Find the card of the bookmark to which you want to add a link.
|
Use the search box at the top of the page
To make it easier to find the bookmark you are looking for, you can:
|
Step 3: Navigate to the 'Links management' page
by pressing the Manage links button on the bookmark card
Figure 9. The card for the created bookmark with the Manage links button
and then on the Create new link button in the top right corner of the links management page.
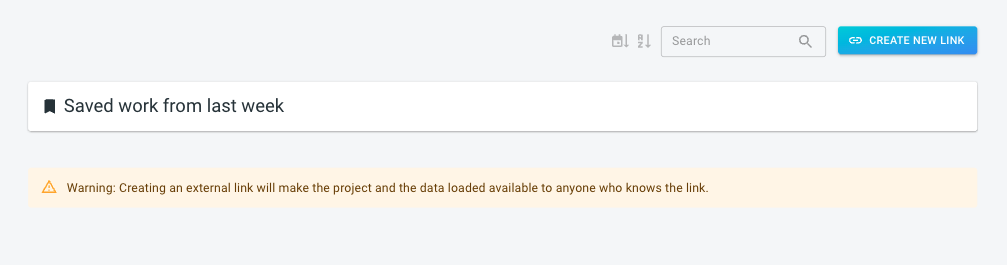
Figure 10. The Create new link button
Step 4: Create the link
Provide a name for the link, and indicate which page should be opened when people access the link.
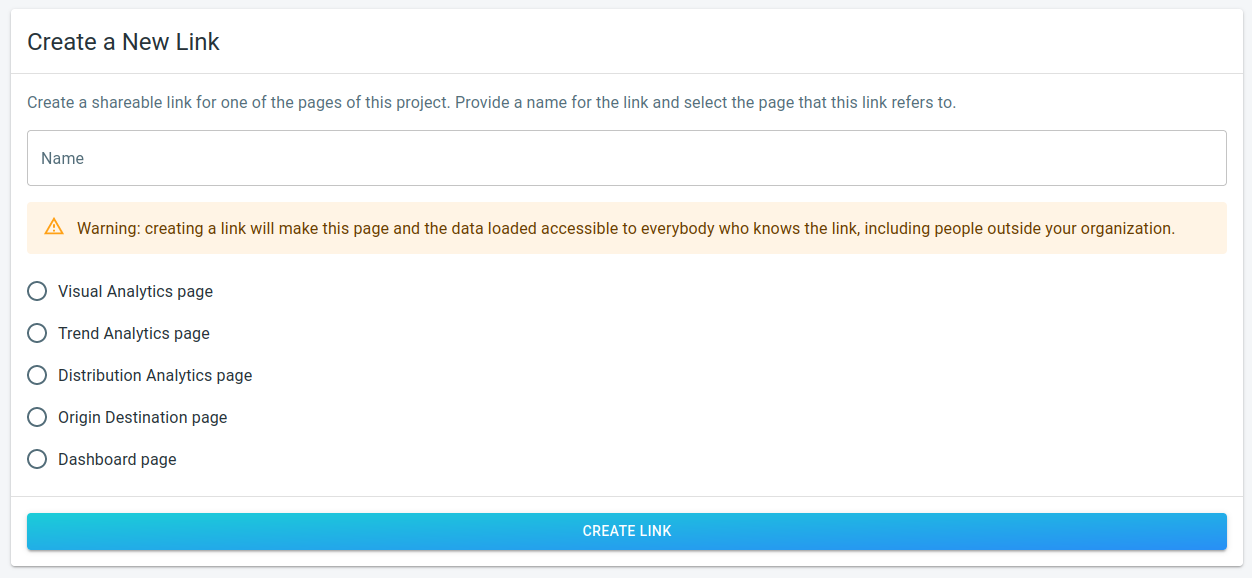
Figure 11. The form to create a new link
Step 5: Share the link or embed
Once the link is created, you will be redirected to the links management page which now includes your newly created link.
Each link has a few buttons at the bottom of the card:

Figure 12. The card for a link
-
Copy link: this copies the link to your clipboard. You can now paste it into another application.
-
Twitter: shortcut to share the link on Twitter. you will still need to complete the tweet before it gets posted.
-
LinkedIn: shortcut to share the link on LinkedIn. you will still need to complete the post before it gets posted.
-
Email: creates an email in the default email application for your machine. The email contains the link you want to share.
-
Embed: copies code to embed an interactive page in your website to your clipboard. You can now paste that code into the html of your website.
Got feedback? Additional questions? Just want to have a friendly chat?
Get in touch!