Got feedback? Additional questions? Just want to have a friendly chat?
Get in touch!
|
This article only addresses the basic filtering options
This article only addresses the basic filtering options that are available in the UI. You can also create more advanced filters through a query language, which is explained here. |
Introduction
This article lists the available spatial filters and how you can apply them.
It’s strongly recommended to first read the introduction article which explains how the visual analytics page uses these filters.
The available spatial filters
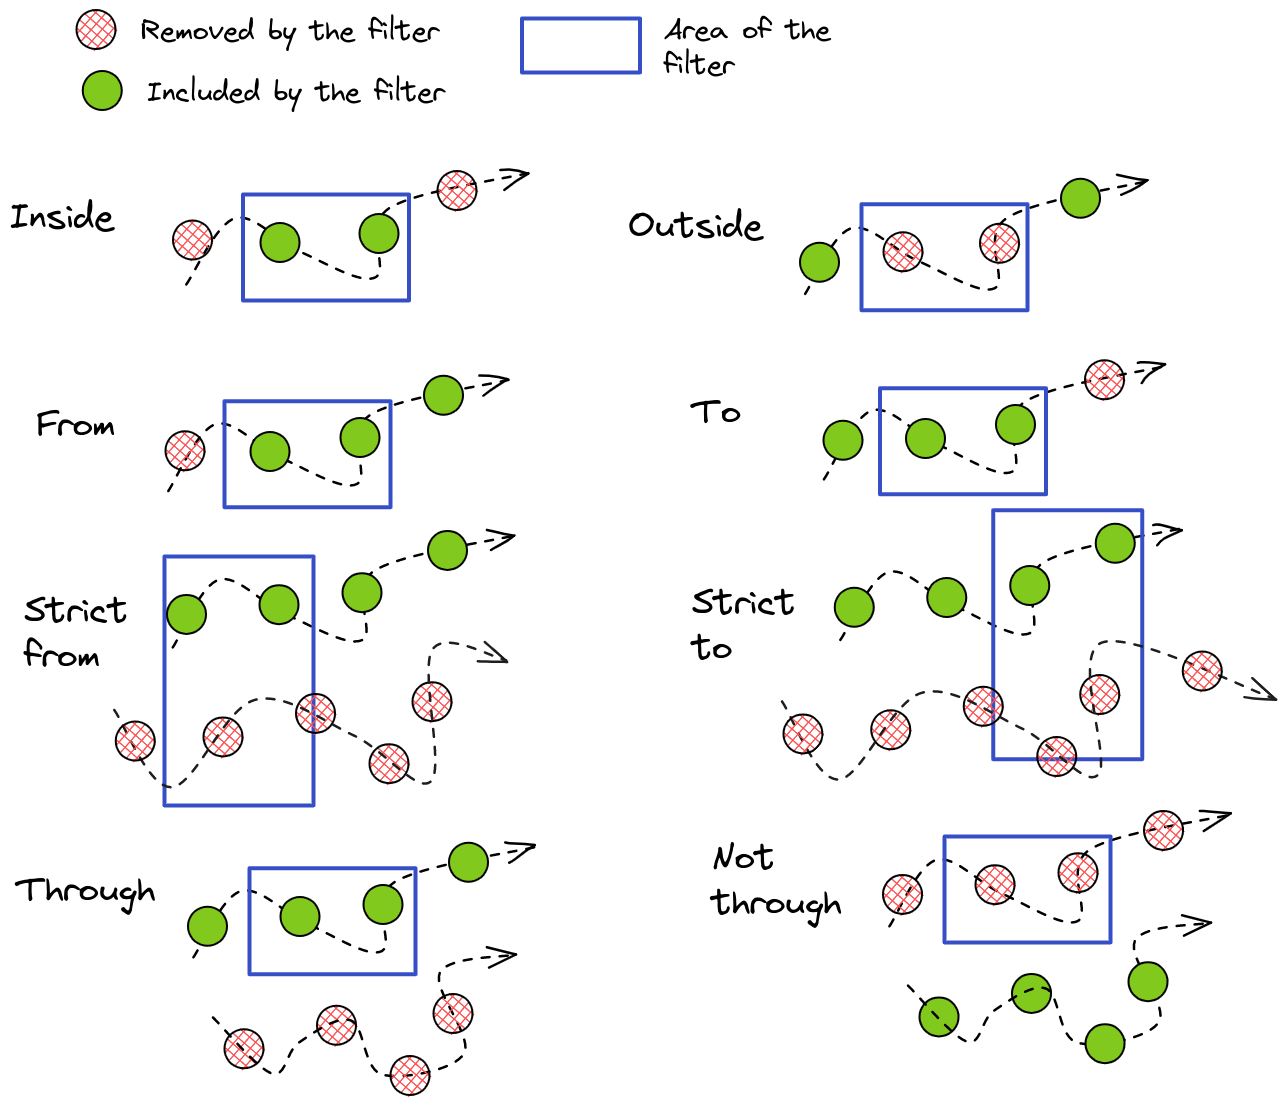
There are 8 different types of spatial filters:
-
Inside an area: only show the data that is contained in a specific area.
-
Outside an area: only show the data that is not contained in a specific area
-
Through an area: show all the records for assets that have at least one location recorded in the specified area.
For example when visualizing vessel data, it will only show the vessels that pass through the specified area and hide all other vessels. For the vessels that are shown, their whole trajectory is displayed.
-
Not through an area: show all the records for assets that have zero records in the specified area.
-
From an area: show the assets that have at least one location recorded in that area, but only show the recorded locations on their trajectory after they entered that area for the first time. Any recorded location before they entered that area for the first time will be filtered out.
For example when a car is traveling from Los Angeles to New York, and you create a from filter around Colorado, only the Colorado to New York part of the journey is included. The first part from Los Angeles to Colorado is filtered out.
-
Strict from an area: show only the records of assets where the first record is contained in the area.
-
To an area: show the assets that have at least one location recorded in that area, but only show the recorded locations on their trajectory before they entered that area for the last time. Any recorded location after they entered that area for the last time will be filtered out.
For example when a car is traveling from Los Angeles to New York, and you create a to filter around Colorado, only the Los Angeles to Colorado part of the journey is included. The last part from Colorado to New York is filtered out.
-
Strict to an area: show only the records of assets where the last record is contained in the area.
Visually, this looks like
Figure 1. Illustration of the different types of spatial filters
Creating spatial filters
Using the controllers of the spatial map
You can interact in multiple ways with the spatial map to create and edit spatial filters. For this, you will activate a controller from the toolbar at the top of the map, followed by some actions on the map.
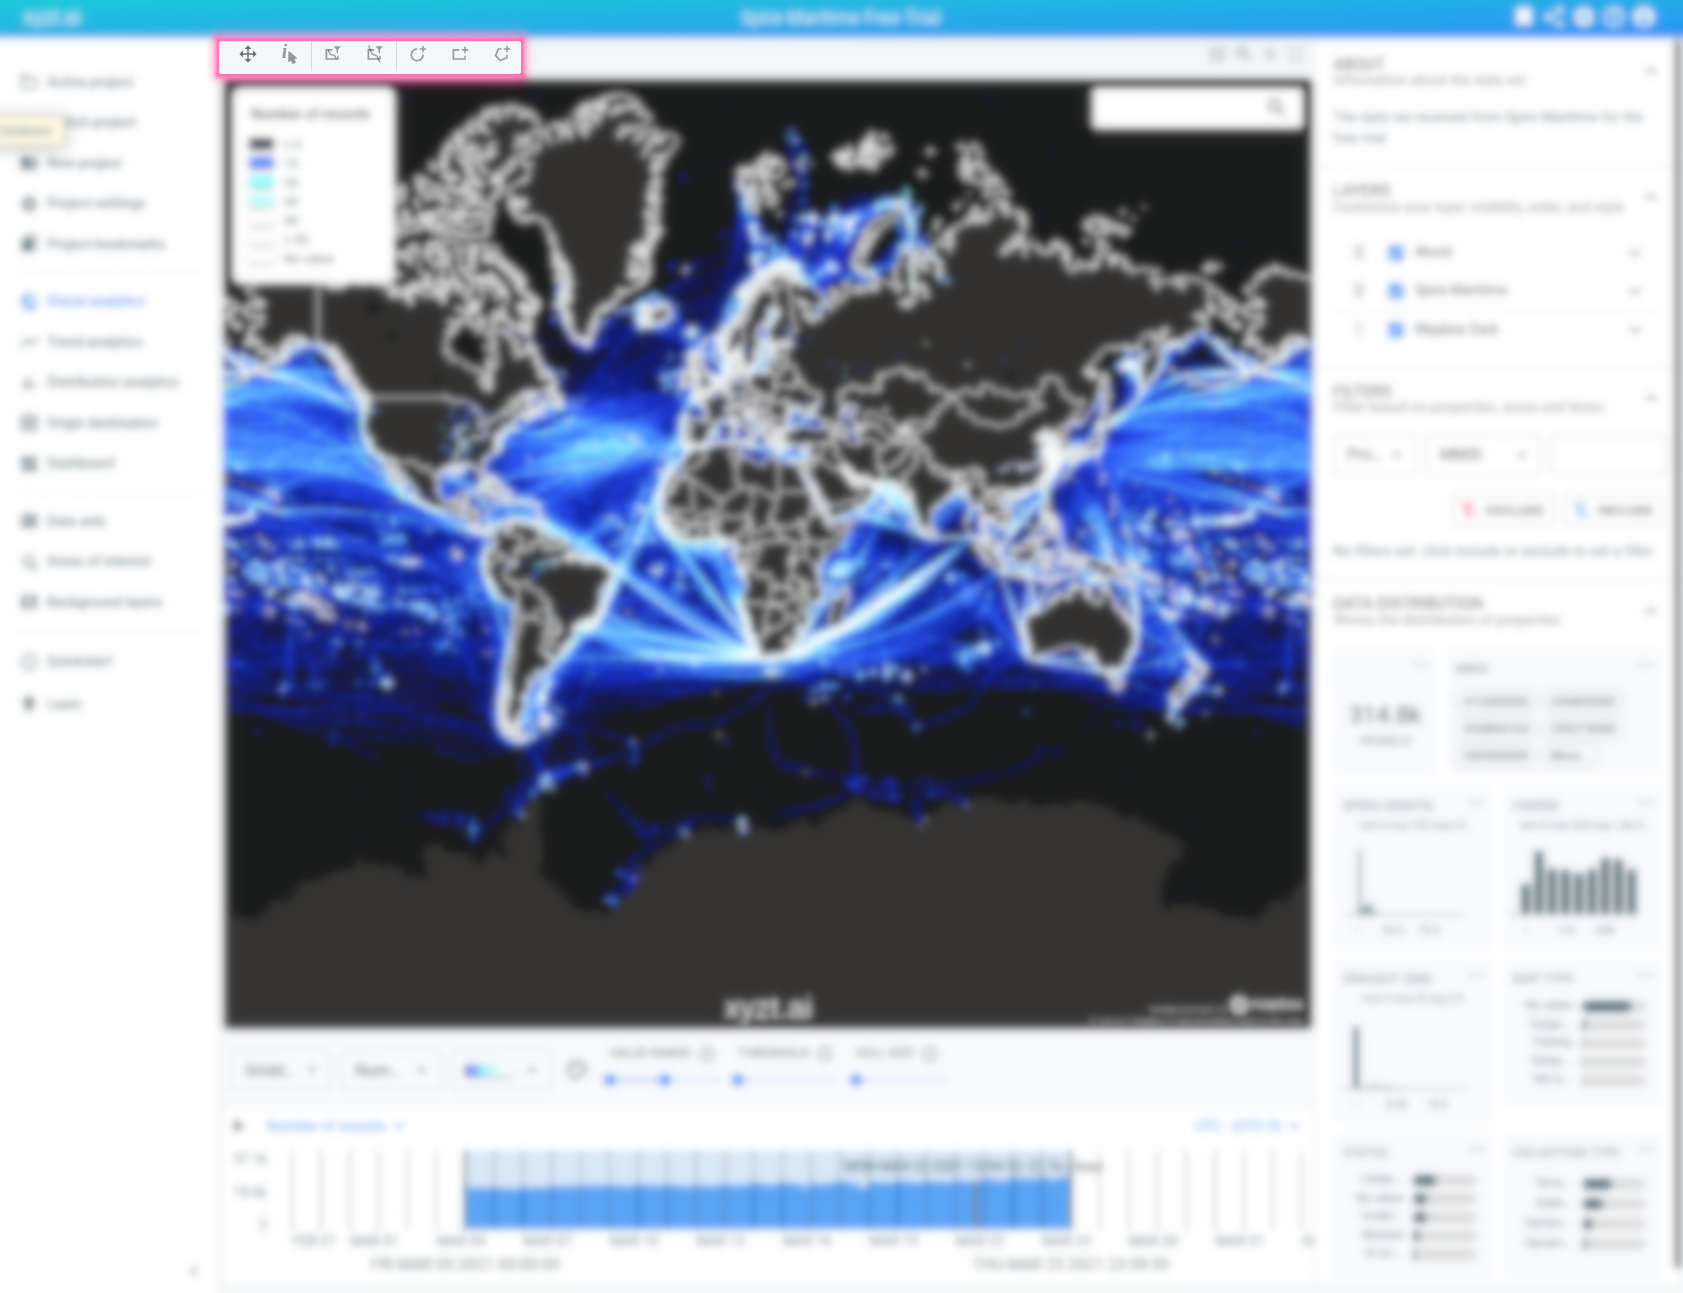
Figure 2. The highlighted toolbar at the of the spatial map
This toolbar contains the following controllers, from left to right:

Figure 3. The controllers in the toolbar at the top of the spatial map
-
Navigation/select controller (inside filter): this controller allows panning around (left mouse button drag) and zoom in/out (using the scroll wheel).
The visible bounds of the map are an inside filter, and those bounds can be adjusted by panning and zooming with this controller.
For example when zoomed in on North America, the visual analytics page will filter out all the data that is not contained in North America. As a result, the timeline and property distributions will only include the data from North America as well.
See the Introduction for more details on how the filters in the visual analytics page affect all 3 views.
-
Info controller: clicking on the map using this controller shows an info box on the map with more information about the data at the clicked location.
-
Temporary inside filter controller (inside filter): by left mouse button dragging with this controller, you will draw a temporary rectangle on the map.
This rectangle is used as an inside filter. This is a convenient way to quickly focus on the data of a specific area.
As soon as you turn of this controller, click on the map or start creating another rectangle, your original rectangle (and hence the spatial filter) will be removed.
-
Temporary through filter controller (through filter): the same as the temporary inside filter controller, but with this controller the rectangle is used as a through filter.
-
Shape creation controllers (any spatial filter): the last 3 controllers are used to draw a permanent shape on the map (a circle, a rectangle or a polygon). Check the tooltip of the controller button for information on how to create the shape.
When creating the shape, a dialog appears where you can immediately decide to use the shape as a spatial filter.
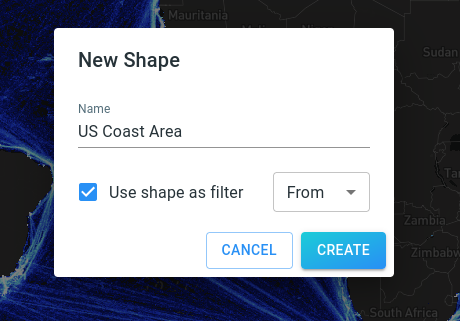 Figure 4. The dialog when drawing a new shape where you can indicate it should be used as filter and select the filter type
You can always decide afterwards to add or remove the shape as spatial filter.
Using shapes as spatial filter
There are 2 kind of shapes you can use as spatial filters:
-
The ones you have drawn on the map using one of the shape creation controllers (see previous section).
-
The area of interest shapes, obtained from the area of interest layers included in your project.
There are 2 ways to use a shape as a filter:
-
Through the spatial map:
-
Activate the navigation/select controller (the first controller)
-
Select the shape you want to use as filter by left-clicking on it. Make sure you deselect any previously selected shapes first (by left-clicking on them again)
-
Right-click on the selected shape, and trigger the Use Shape as Filter action from the pop-up menu
-
If you want to remove the filter again, you can left-click on the blue cross that will appear next to the shape that is used as filter.
-
-
Through the filters panel: the filters panel is located in the Layers panel on the right-hand side of the visual analytics page.
-
In the first drop-down, select Area
-
In the second drop-down, select the shape you want to use as filter
-
In the third drop-down, select the type of filter you want to create
-
Press the INCLUDE button
-
The filter will be added to the list of filters at the bottom of the panel. You can remove the filter afterwards by clicking on the cross icon of the filter.
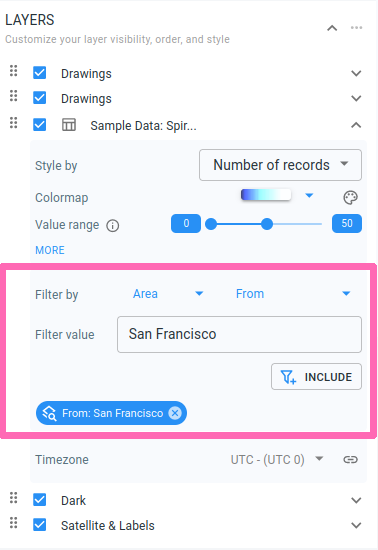 Figure 5. The filter panel showing the created From filter
The filter is only used for the data set layer on which you configure it. This allows to specify different filters for different data sets.
-
Got feedback? Additional questions? Just want to have a friendly chat?
Get in touch!