Got feedback? Additional questions? Just want to have a friendly chat?
Get in touch!
Available parts
- Goal
- Step 0: Obtain data
- Step 1: Create the roads data set
- Step 2: Configure geometry properties (current)
- Step 3: Upload the GeoJSON file
- Step 4: Define and upload a movement path data set
- Further reading
Step 2: Define the structure of the road segment GeoJSON data
At this point, you have created a new, empty data set. It does not contain any data yet, nor does the platform know anything about the structure and properties of the data.
You will now configure the data set by defining the structure of the .geojson file as follows.
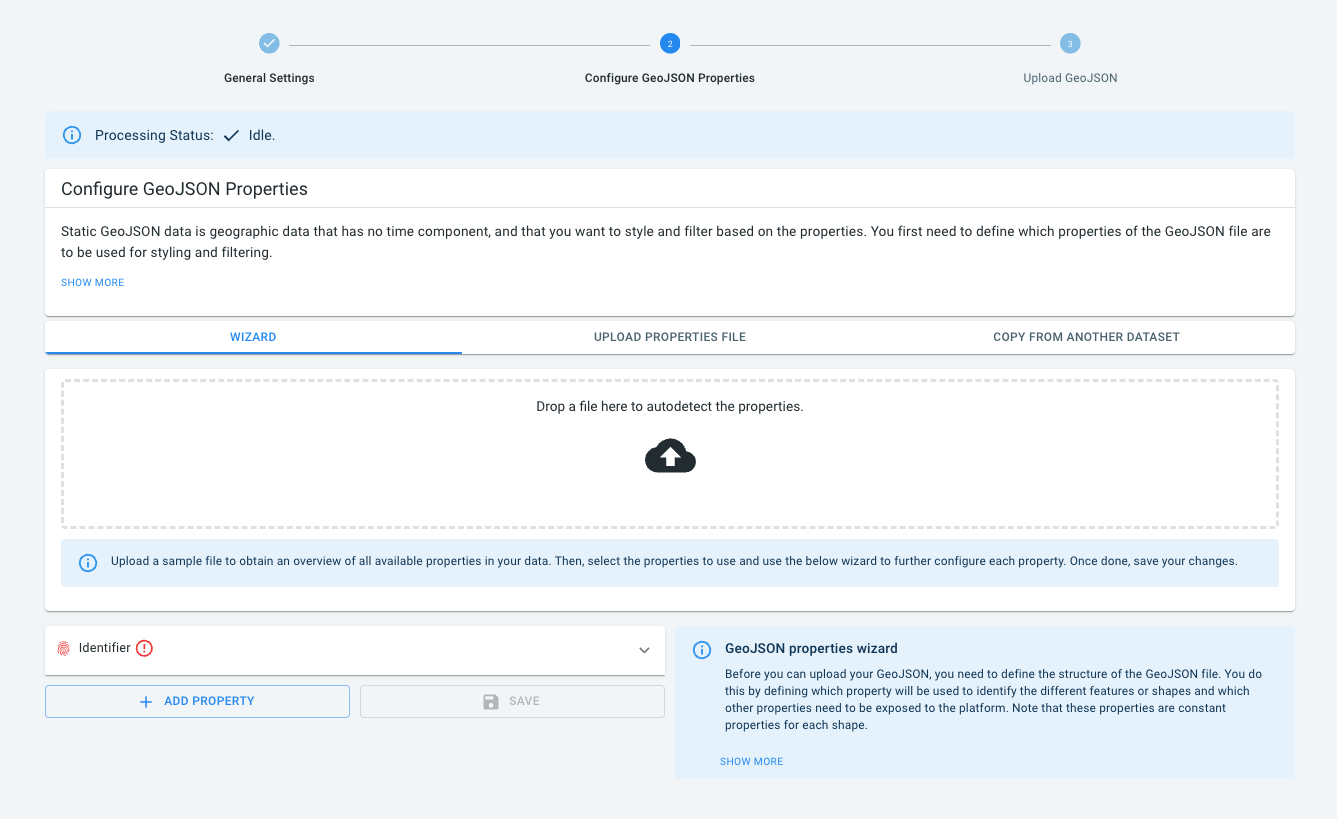
Step 2.1: Navigate to the Configure Geometry Properties UI
Click on the Configure Geometry Properties button in the navigation bar
Figure 1. The navigation bar after clicking on the Configure Data Properties button.
Step 2.2: Gather information about your data set
Let us first understand the structure of the GeoJSON file by uploading it to the wizard drop box. Simply drop the roads.geojson.gz file on the wizard’s drop box.
The platform looks at the first features in the GeoJSON file and lists its properties in a previewer:
-
priorityLevel: A number indicating the importance of a feature. Number 1 means highly important and number 5 least important.
-
segmentId: Uniquely identifies each feature.
-
roadClass: A human-readable road class property, such as
motorway,tertiary road,… -
name: The name of the road the segment belongs to, if any. Can be blank for roads without a name
-
reverseId: For two-way roads, the unique identifier of the opposing direction. Note that this data set does not contain explicit features for the opposite directions.
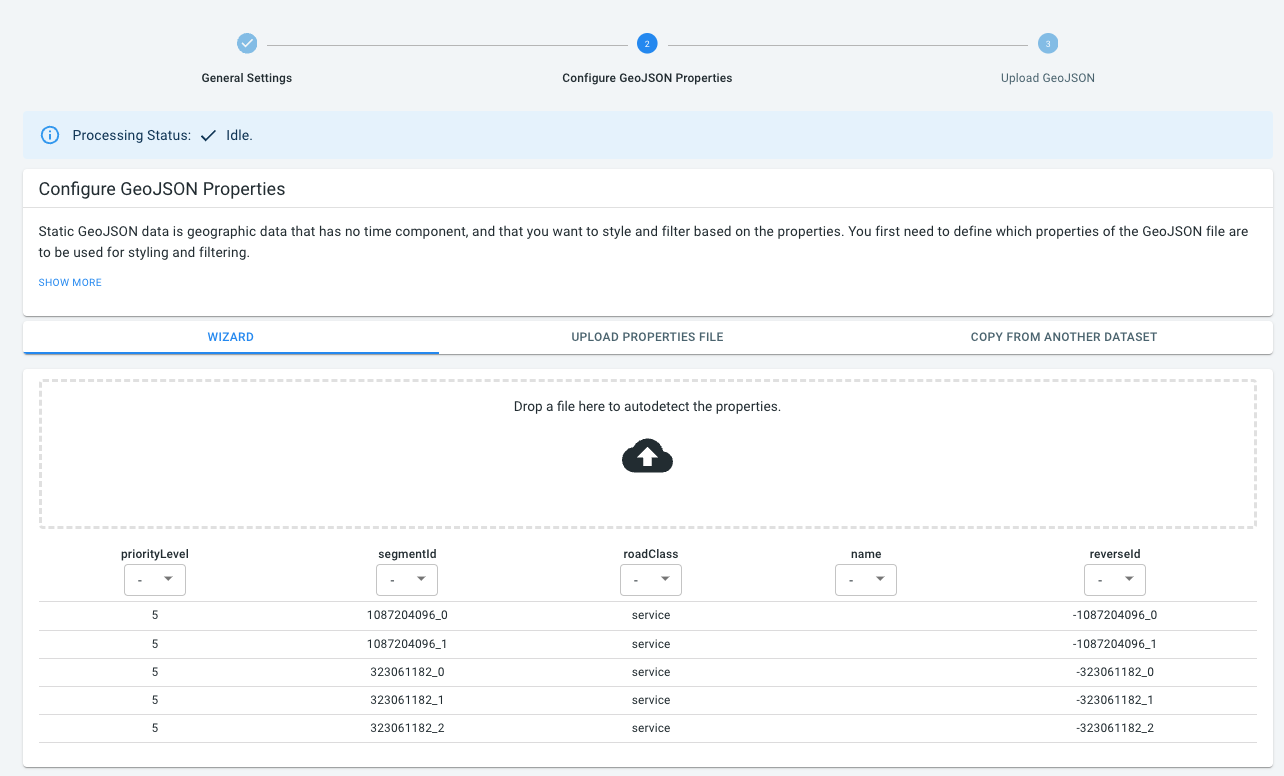
Figure 2. Preview of the first few features in the GeoJSON file.
Note how below the name of the different detected properties, a drop-down box appears.
We will now configure the different properties in the GeoJSON file.
Step 2.3: Use the wizard to configure the required properties
In a first step we will use the drop-down boxes in the table headers to start configuring the different properties:
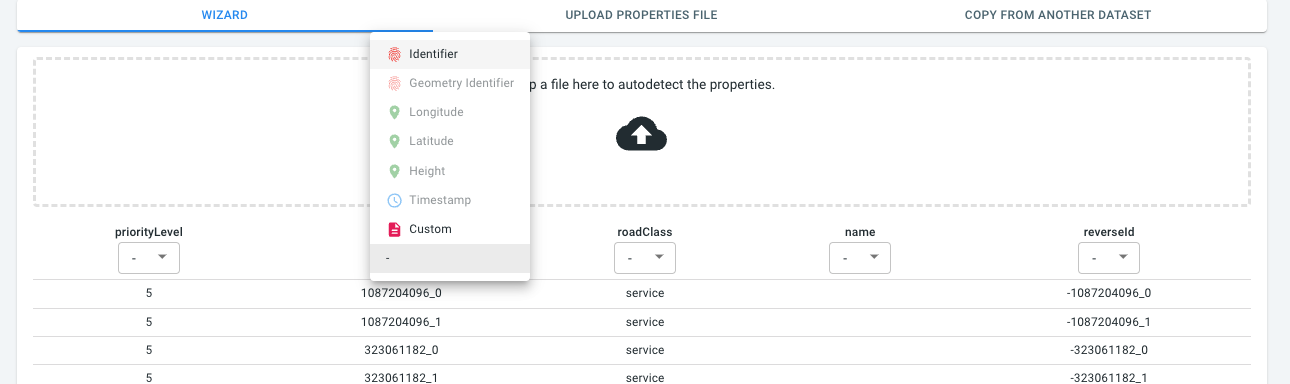
Figure 3. Configuring the different properties.
Configure following properties as follows:
-
priorityLevel → Custom
-
segmentId → Identifier
-
roadClass → Custom
-
name → Custom
-
reverseId → Custom
We have one required property (segmentId which is the Identifier) and 4 custom properties.
We will now further customize these properties.
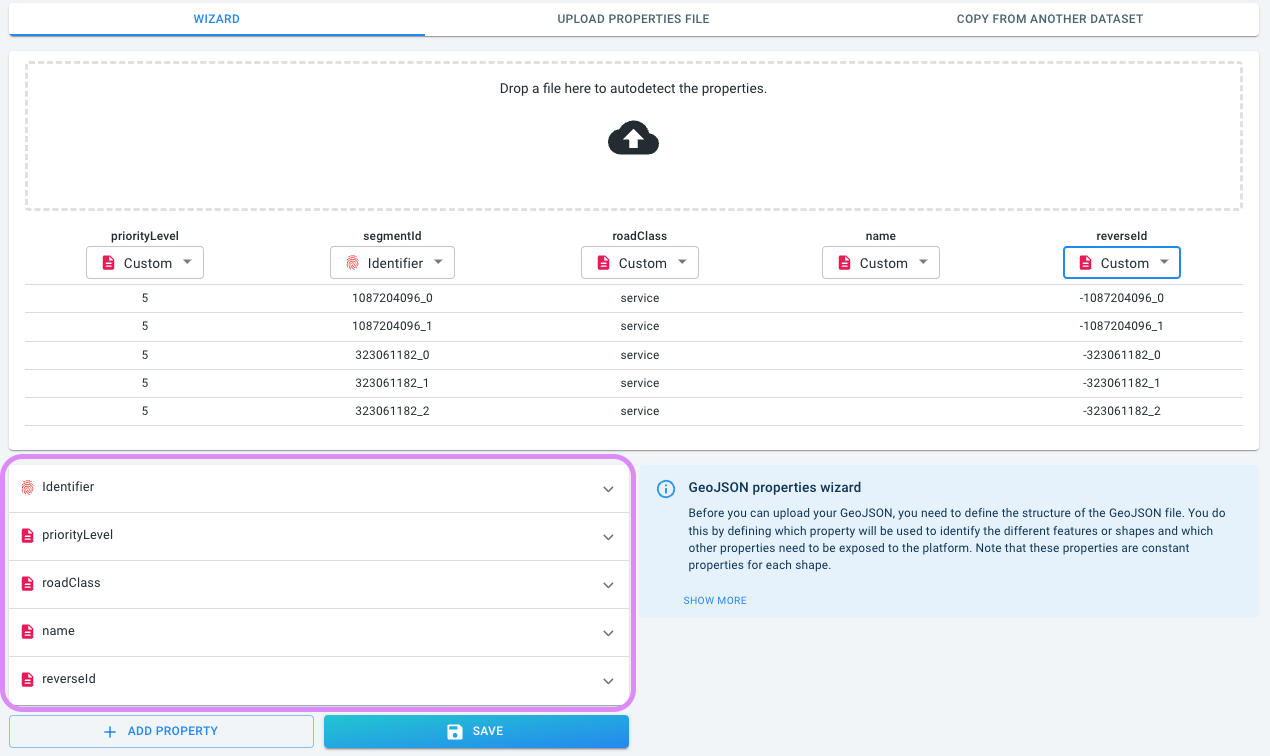
Figure 4. Configuring the custom properties.
Identifier
The identifier requires no further customization. You can click on the expandable panel to see it only requires the name of the property, which we already set above.

Figure 5. Configuring the identifier.
|
The wizard has context-sensitive help messages
The info box on the right-hand side of the wizard contains some additional information. This information updates based on the property you are currently editing. |
priorityLevel
This is a custom property that will be used by the platform to prioritize more important road segments over others. For instance, when looking at large areas, i.e., when zoomed out, it is more important to see the highways than to see the small service roads.
Configure it as follows:
-
Click on priorityLevel to expand the configuration panel.
-
Select
enumas the data type instead ofshortas this property represents a fixed set of values rather than a generic number. -
Select
Priority visibility levelin the last drop-down box.
By doing so, the platform will know that this data property corresponds to the priority level.
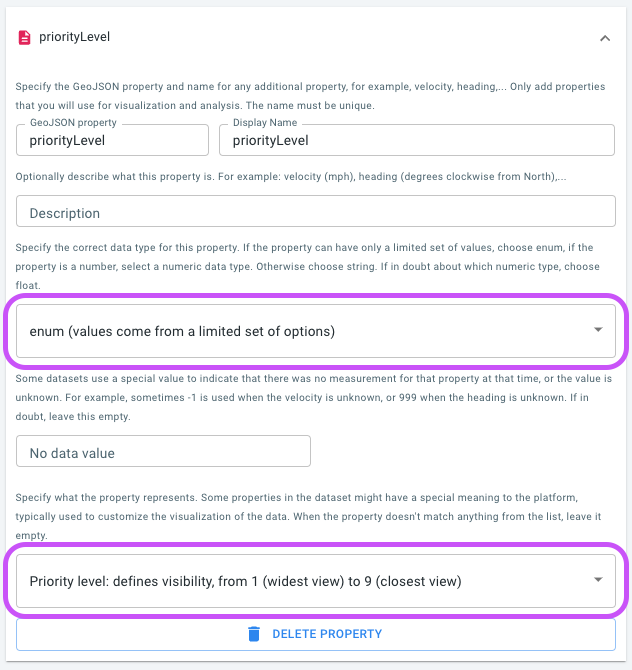
Figure 6. The wizard to configure the priorityLevel property.
|
Prepare your road network data with a priority level
In order to handle country-wide road networks, having a priority level property is a must. When working with your own road network data, prepare your data with a priority level for instance as follows:
|
roadClass
The roadClass custom property provides a human-readable road class for each road segment, such as motorway, trunk, etc. The platform auto-detects it as a string. You can also configure it as an enum as there are only a limited set of options for this property.
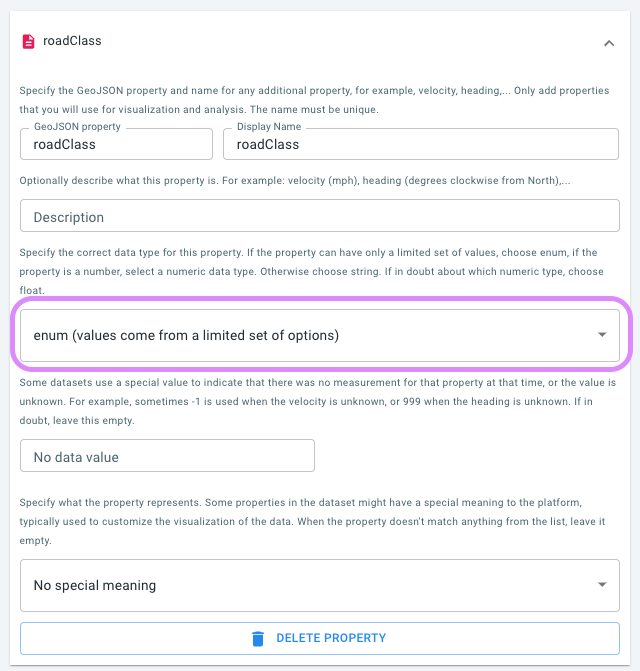
Figure 7. The wizard to configure the roadClass property.
We don’t configure a special meaning for the roadClass property.
name
The road name is a custom property that we configure as the display name. The display name will be used for instance when hovering over the street segments to provide a human-readable name.
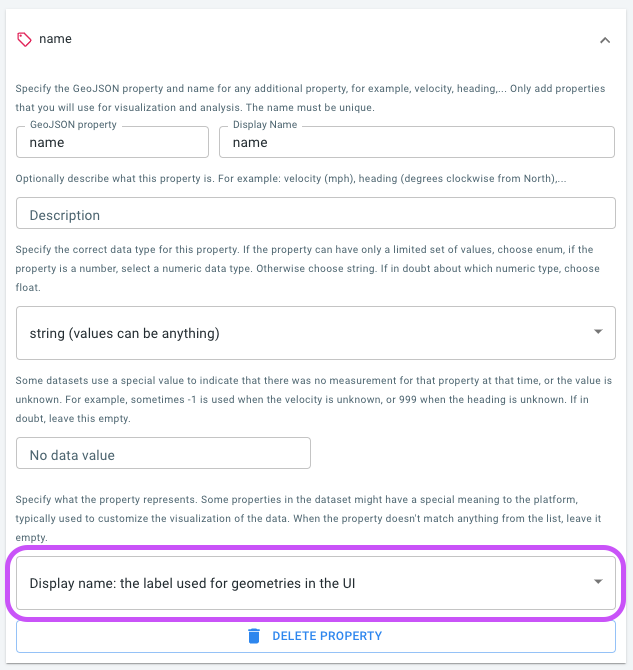
Figure 8. The wizard to configure the name property.
reverseId
The reverseId contains the unique identifier of the opposing direction for two-way streets. The property is absent for one-way streets.
In the last drop-down box, select ID of the feature for the opposing direction on two-way streets.
This way the platform knows which streets are to be treated as two-way streets.
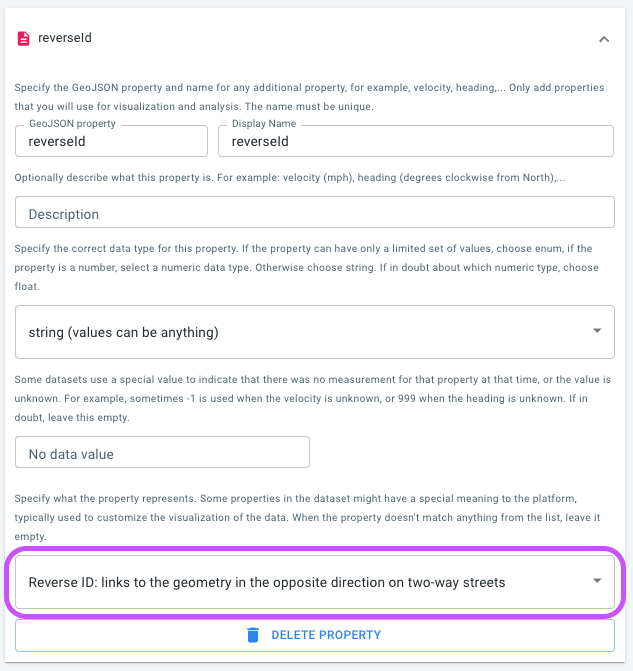
Figure 9. The wizard to configure the name property.
In this sample data set, road segments are uniquely identified by an ID of the form 2341234_0. In case of a two-way street, the opposite direction has the ID -2341234_0. In case you are preparing data yourself, you are free to choose how to model the two directional IDs, just keep in mind that your GeoJSON data set should only contain the features of the positive direction, and not the features of the negative one.
When configuring the reverse ID, the platform automatically configures traffic to be on the right hand side. You can change the traffic side in the General Settings. Setting the right traffic side affects the visualization of two-way roads on the map.

Figure 10. Configuring on which side of the road traffic drives.
Step 2.4: Save the configuration
Now that you have filled in all the properties click on SAVE.
After you have saved the configuration, a table showing the properties of your data will appear underneath the wizard:
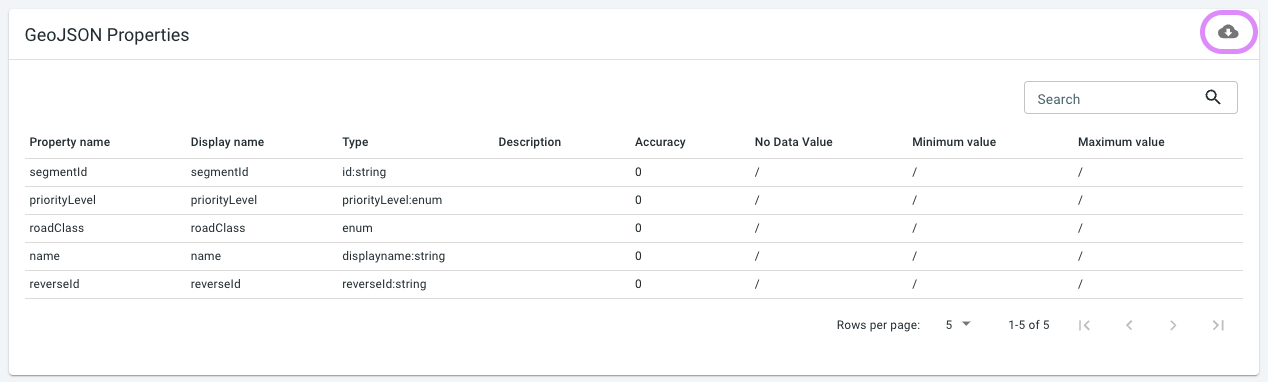
Figure 11. The properties of your GeoJSON data, displayed underneath the wizard.
There are some things to note here:
-
The GeoJSON properties overview shows a tabular representation of what you configured in the wizard. This representation can be downloaded as a
.csvfile that you can use later on to define new data sets, or to automate data upload through the API. -
At this point, it is still possible to change the properties. For example if you realize you made a mistake, you can still correct it. Once you start uploading data, it is no longer possible to make changes to the GeoJSON structure.
|
Validating your properties
You can use the data validator on this page to verify if your data files match the defined properties. |
|
Other ways of defining your data
In this tutorial we use the wizard to define the structure of the data.
You can also define this in a separate file (in This is explained in more detail here. |
Next part
Go to the next part: Step 3: Upload the GeoJSON file
Got feedback? Additional questions? Just want to have a friendly chat?
Get in touch!