Available parts
- Goal
- Step 0: Obtain data
- Step 1: Create data set
- Step 2: Define the properties (current)
- Step 3: Configure the processing settings
- Step 4: Upload the Parquet file
- Step 5: Use your data set
- Further reading
Step 2: Define the properties of the Parquet file
At this point, you have created a new, empty data set. It does not contain any data yet.
First, you will define which of the properties of the .parquet files are relevant:
-
The platform must know which property represents the longitude, latitude, and timestamp.
-
You need to indicate if you want additional properties to be available for analysis.
Step 2.1: Navigate to the Configure Data Properties step
Normally, you are already here, but if not, click on the Configure Data Properties button in the navigation bar.
Step 2.2: Gather information about the properties
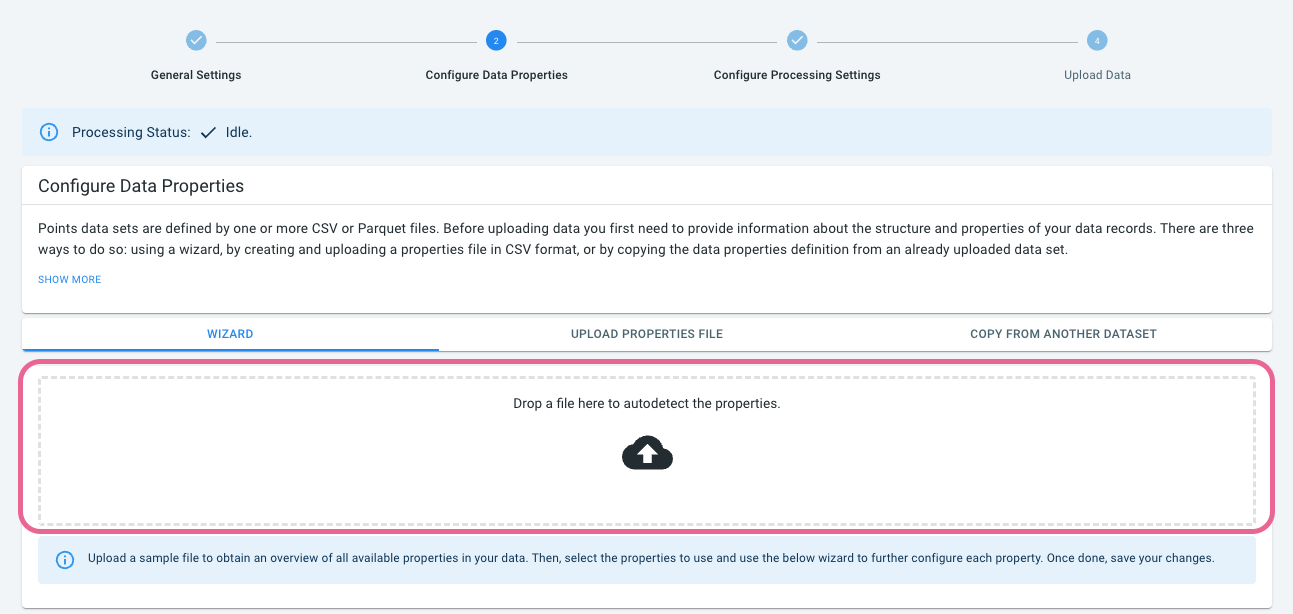
Let’s upload our .parquet file in the Wizard dropbox. This will provide you a preview of all the properties in the data with their names. The first few entries will also be shown for easy reference.
Step 2.3: Use the preview table to select the properties to use
Now that you see the different properties in the data, you have to select which properties to use.
You do so using the drop-down boxes above the table. Select the properties that we are going to use as follows:
-
Local_Time as Timestamp (Note that times are local times in the point location time zone, this makes that we can compare accidents across the entire USA.)
-
Latitude as Latitude
-
Longitude as Longitude
-
Severity as Custom (Severity is 1 when the delay on the road network caused by the accident is small, and 4 when it is large.)
-
Conditions as Custom (An enumeration that provides info on the current environmental conditions at the time of the accident.)
Step 2.4: Use the wizard to configure the properties
Below the table, on the left, you see the selected properties mentioned.
-
Click on Location to expand this panel. Longitude and Latitude are combined under Location.
-
Click on Timestamp to expand this panel. Note how it mentions
Local_Timeas the Parquet property to use for the timestamp. -
Click on Severity to expend this panel. You will see that the platform has selected
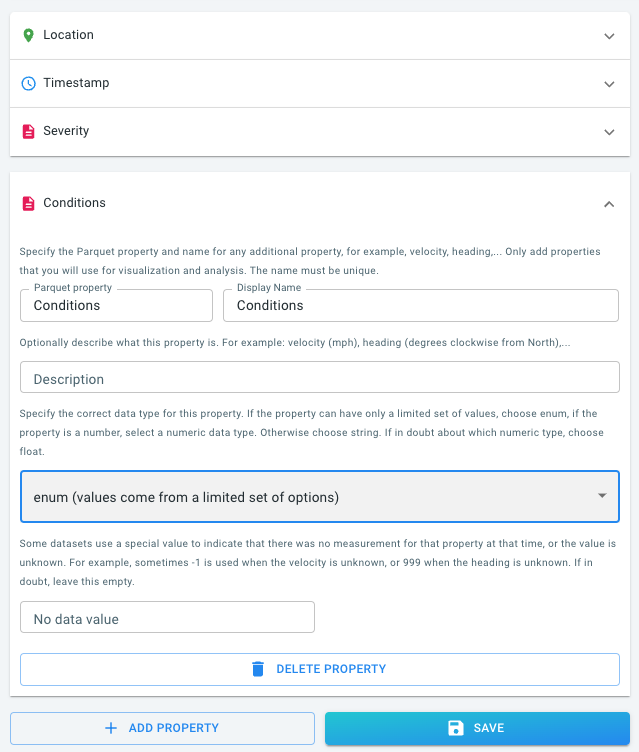
longas the type for this property. Change this toenum. Even though Severity is modeled as a number, the numbers will be used as enumerations where 1 is a short delay, and 4 is the longest delay caused by an accident. -
Click on Conditions and also make this property an
enum.
|
The wizard has context-sensitive help messages
The info box on the right-hand side of the wizard contains some additional information. This information updates based on the property you are currently editing. |
Step 2.5: Save the configuration
Now that you have filled in all the properties you want to have available for analysis, you still have to press the save button at the bottom of the wizard to save this configuration.
After you have saved the configuration, a table showing the properties of your data will appear underneath the wizard:
At this point, it is still possible to change the properties.
For example, if you realize you made a mistake, you can still correct it.
Once you start uploading your .parquet file, it is no longer possible to make changes to the data structure.
|
Other ways of defining your data
In this tutorial we used the wizard to define the structure of the data.
You can also define this in a separate file (in This is explained in more detail here. |
Next part
Go to the next part: Step 3: Configure the processing settings


