Got feedback? Additional questions? Just want to have a friendly chat?
Get in touch!
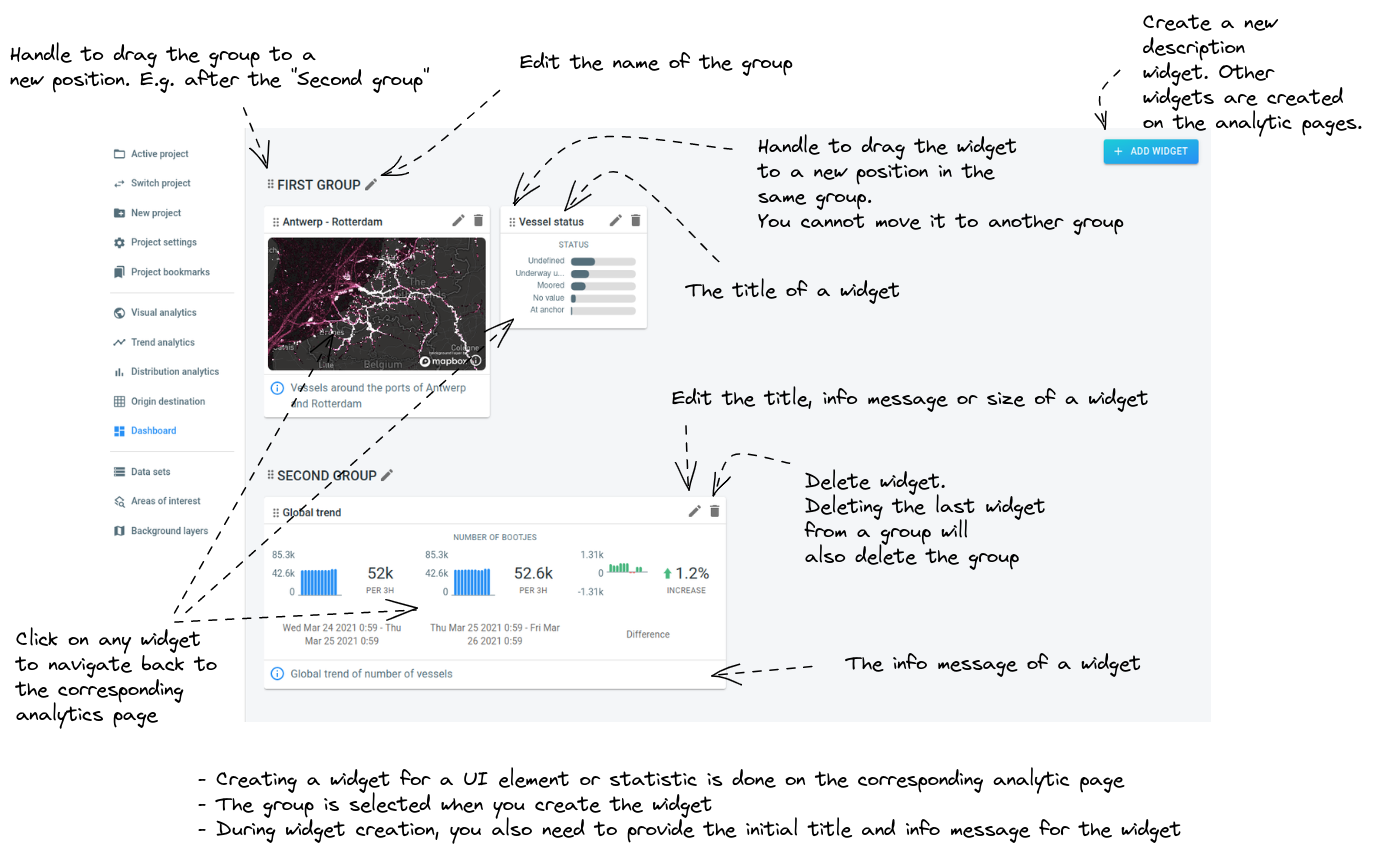
UI overview
Figure 1. Overview of the Dashboard page UI
The group title:
-
has a handle to move the group to a new location. For example moving the group from the first to the second position.
-
has an edit button to adjust the title
Each widget has:
-
A title at the top, and an info message at the bottom.
-
In the top-left corner, a handle to move the widget to a new location in the group. You cannot move the widget to another group though.
-
In the top right corner, buttons to delete the widget or to edit the title, info message and size
-
A clickable area at the center. Clicking on it will navigate you to the corresponding analytics page, and restore the state to the same state as when the widget was created.
Widget creation
In the top-right corner of the page there is a button to add a new description widget. This widget is text-only, and is typically used to add some more information to the dashboard.
The creation of all the other widgets happens on the analytic pages. Consult the following articles to find out how:
|
You can use HTML in the description widget
The description widget supports some HTML tags. You can use this to include links or images, or draw attention with bold or italic text. You can even use the |
Got feedback? Additional questions? Just want to have a friendly chat?
Get in touch!