      "properties": {
        "shape_area": "0.0007823067885",
        "objectid": "1",
        "shape_leng": "0.116357453189",
        "location_id": "1",
        "zone": "Newark Airport",
        "borough": "EWR"
      }
Got feedback? Additional questions? Just want to have a friendly chat?
Get in touch!
Available parts
- Goal
- Step 0: Obtain data
- Step 1: Create data set
- Step 2: Define the geometry properties (current)
- Step 3: Upload the geojson file
- Step 4: Define csv data structure
- Step 5: Upload the csv file
- Step 6: Use your data set
- Further reading
Step 2: Define the properties of the GeoJSON file
At this point, you have created a new, empty data set. It does not contain any data yet, nor knows the platform anything about the pick-up locations yet.
First, you will define which of the properties of the .geojson file are relevant:
-
The platform must know which property represents the ID of each pick-up location. That way, when it encounters the same ID in the
.csvfile with the time-varying data, it knows to which pick-up location that taxi trip belongs. -
You need to indicate if you want additional properties to be available for analysis.
Step 2.1: Navigate to the Configure Geometry Properties step
by clicking on the Configure Geometry Properties button in the navigation bar
Step 2.2: Gather information about the properties
Let us first have a look which properties are available in the GeoJSON file that you have downloaded before.
The properties of a single location look like:
For this tutorial, you will use the following properties:
-
The location_id: this is the identifier of the area, and is required.
-
The zone, borough and shape_area properties can be interesting to include. It would for example allow you to restrict the data to the EWR borough only.
|
Auto-detect the available properties
When you don’t know which properties are present in your file, you can also upload the file to inspect and select which properties you want to include. See this article for more information. |
Step 2.3: Use the wizard to configure the required property
Now that you know which property represents the location id, you can provide this info to the platform. This tutorial uses the wizard for this.
Right now, the wizard contains the single required property (but since it is not provided, it is marked as invalid):
-
The identifier: each pick-up location has an id associated with it. This id is used in each row of the
.csvfiles to refer to that location. The platform needs to know which of the properties in the.geojsonfile represents that identifier.
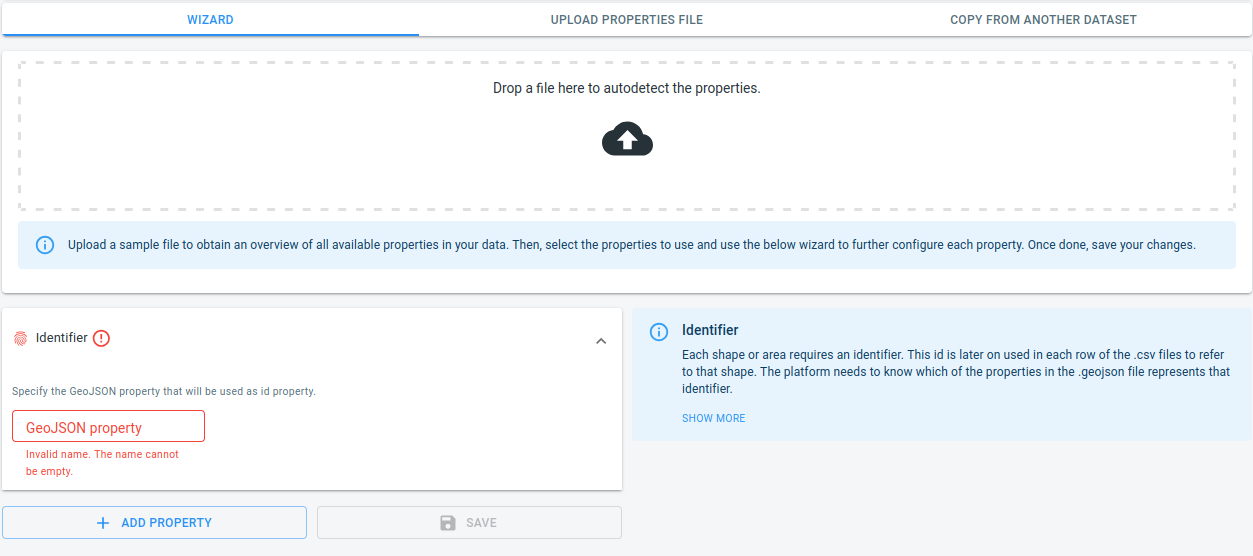
Figure 1. Using the wizard to configure time series data.
|
The wizard has context-sensitive help messages
The info box on the right-hand side of the wizard contains some additional information. This information updates based on the property you are currently editing. |
Identifier
The identifier in our GeoJSON file is the location_id property.
Click on the Identifier button in the wizard and add that information.

Figure 2. Specifying to use location_id as the identifier of the taxi zones.
Step 2.4: Use the wizard to configure additional properties
If you stopped here, you won’t have access to the additional properties of each pick-up location during analysis. But most likely, you will want to make some additional properties available.
For this tutorial, you can for example add the zone and borough.
For each of these properties, you need to specify:
-
The name of the property in the
.geojsonfile -
The display name: this display name is a human-readable string for the property that will be shown in the platform.
-
The type of the property value: the values of a property can be strings, numbers, booleans .
|
More details about the type of the column available
If you are unsure what the data type for your column is, consult the help on the right-hand side of the wizard. We also have an additional article with more guidance available. |
The borough property
Press the ADD PROPERTY button at the bottom of the wizard, and fill in the details for this new property.
In this case, the display name can be the same as the name as "borough" is perfectly suited to show to a user.
The type of this property is an enumeration, as there are only a limited number of boroughs.
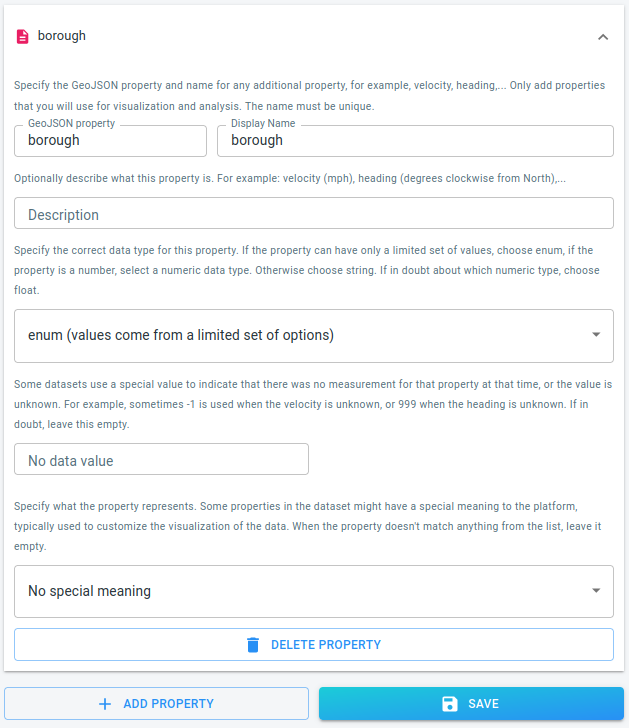
Figure 3. Specifying an additional property from the GeoJSON file.
The zone property
Press the ADD PROPERTY button at the bottom of the wizard, and fill in the details for this new property.
In this case, you are going to change the display name. The "zone" property represents the name of the pick-up location, hence it makes more sense to call this property "location name" in the UI.
Additionally, you also indicate that the value of this property should be used as display name for the pick-up locations. You can do this at the bottom of the configuration by assigning the special meaning "Display name for the areas".
By default, when the platform lists the available areas defined in the GeoJSON file, it shows the ID of each area. In this case, that ID is meaningless to a user as it is just a number. By marking this property as the display name for the areas, the platform will show this name instead of the id.
As there is only a limited set of zones, choose enum as data type.
This for example allows to create a filter to "only show the data from the Newark Airport area" instead of having to use "only show the data from the 1 area".

Figure 4. Specifying an additional property from the GeoJSON file.
Step 2.5: Save the configuration
Now that you have filled in all the properties you want to have available for analysis, you still have to press the save button at the bottom of the wizard to save this configuration.
After you have saved the configuration, a table showing the properties of your data will appear underneath the wizard:
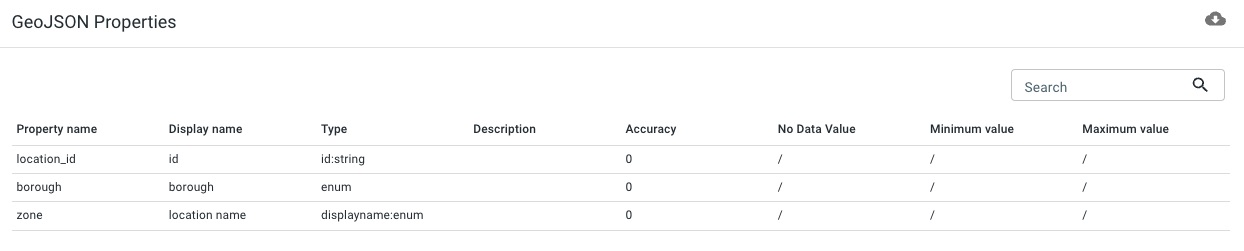
Figure 5. Table summarizing the configured properties to be used for the GeoJSON file.
At this point, it is still possible to change the properties.
For example, if you realize you made a mistake, you can still correct it.
Once you start uploading your .geojson file, it is no longer possible to make changes to the data structure.
|
Other ways of defining your data
In this tutorial we used the wizard to define the structure of the data.
You can also define this in a separate file (in This is explained in more detail here. |
Next part
Go to the next part: Step 3: Upload the geojson file
Got feedback? Additional questions? Just want to have a friendly chat?
Get in touch!